
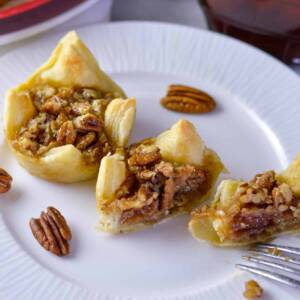
I love baking, but pie crust and pie making has been my nemesis and one of my least enjoyable baking feats for years. I’ve only truly gotten into making pie crust in the last couple years. Let me tell you, I’ve had to screw up a WHOLE LOTTA pies just to get to this point where I’m even comfortable sharing my experience now with you. I finally feel like this simple butter pie crust recipe has the perfect texture, taste and appeal. I also feel like this pie crust recipe is easy enough to make if you carefully follow the instructions, even if you’re a rookie like me.
Pie Crust Catastrophe
Pie crust and I do not mesh well. Honestly, I have never enjoyed the process of making dough of any kind. I am more of a muffin, cookie and cake baker. There have been quite a few pie crust flops for me to get to this point. I’ve had one flop after another; from watery fillings seeping under my crust during baking to shrinking crust catastrophes. I’m still learning better techniques as I go, but I must say I love the way this crust turns out for a great homemade pie. This pie crust behaves the best for me and hopefully it will for you as well.
Butter Pie Crust
I took a class not too long ago on making pie crust because I need all the help I can get with improving my pie making skills. When discussing the “fat” element of the pie crust most people agreed that good old fashioned butter was the best bet. I would have to agree only because I believe in real ingredients and butter along with it’s great flavor is ideal to me. Some people had differing opinions on the best fat and preferred lard or shortening (I feel those fats fall short of flavor). I would say just use what works and tastes best to you. You may substitute your preferred pie “fat” for the butter if you so choose.
Making Pie Crust
When it comes to making pie crust I’ve found in my experience you need to make the dough and work the dough using the technique that suits you best. From talking to others who make pie crust I found that some prefer only using their hands to work the dough and incorporate the liquid, but others have been making it using a food processor or a mixer for years and they found that method works best for them. I do not have the patience to make it only with my hands. I have made pie crust using a food processor only in the last year and I find that method works best for me. I’m very careful to watch the dough as I add the liquid. You must take it one step at a time and it turns out just perfect.
Pie Pan Preference
I’ve read and heard first hand that glass or ceramic pie pans are the best for even baking. I’ve always used a glass pie pan, but just recently got myself a ceramic one because I read that it helps to reduce shrinkage. If you’re just starting out with pie making glass is great and definitely preferred of metal if you have the choice.
Take deep breaths and don’t quit. Pie making can be frustrating, but the outcome can be so great if you can find a little patience in the process. Enjoy!
Simple Butter Pie Crust
Equipment
Ingredients
- 2 1/2 cups all purpose unbleached flour sifted
- 1 Tbsp granulated cane sugar
- 2 tsp sea salt
- 2 sticks of unsalted butter chilled in the fridge (1 cup/16 oz)
- 1/2 cup ice water only about 2-4 Tbs will actually be needed (amount determined while making dough)
- 2-4 Tbsp vodka chilled in freezer (you may use all ice water if you don’t have vodka or another hard liquor can be substituted) The alcohol helps the crust become flakier.
Instructions
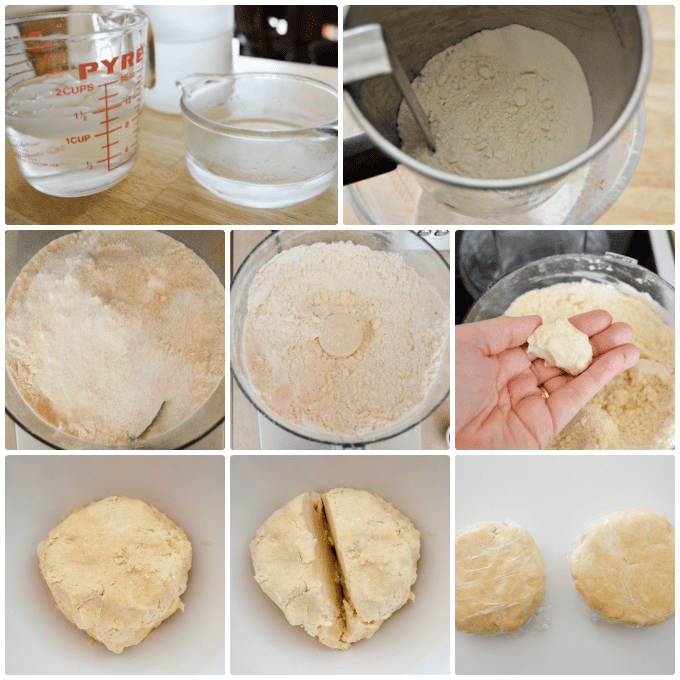
- Sift the flour by scooping out about 1/2 cup of flour at a time into a sifter and sift it into a dry mixing bowl or straight into an extra large measuring cup. (I like to use my 4 cup measuring cup)
- Transfer the flour, salt and sugar to a food processor with a steel blade attached, pulse a couple of times just to mix
- Slice butter into about 1 Tbs chunks and add to food processor (do not let butter sit to warm, you must keep it chilled when adding to food processor)
- Pulse the butter and flour mixture a few times, just till you see butter about pea size
Most Important Instructions
- Slowly add a Tablespoon at time of water and vodka (flipping back and forth between the two)and pulse a few times. This is the most critical point of the pie crust. You must open the food processor and carefully check the dough to see if it's ready. Watch that blade! I have sliced my finger on it pretty well. Your dough is done when you can make a small ball of the dough in your hands and you can toss it up without it sticking to your hands. (This is the best advice I've ever received on getting the perfect consistency for the pie crust).
- Now carefully remove all your dough from the processor and ball it up into one large ball. Then cut the ball right in half to make 2 pie crusts.
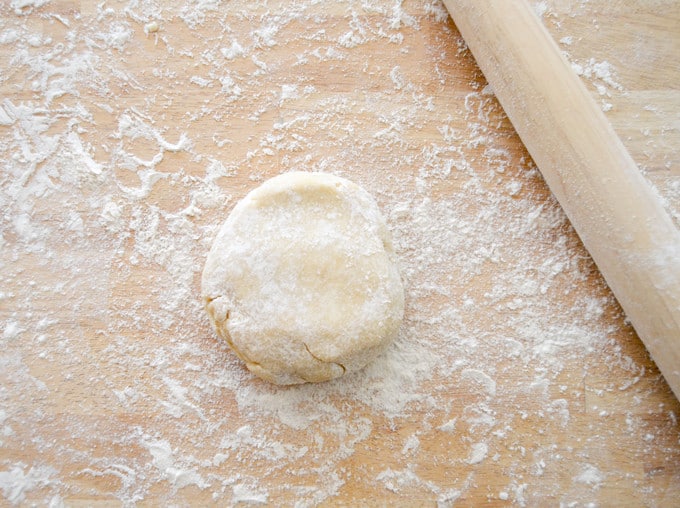
- Wrap in plastic wrap and place in in the fridge at least 30 minutes to chill.
- After that time you’re ready to roll out your dough.
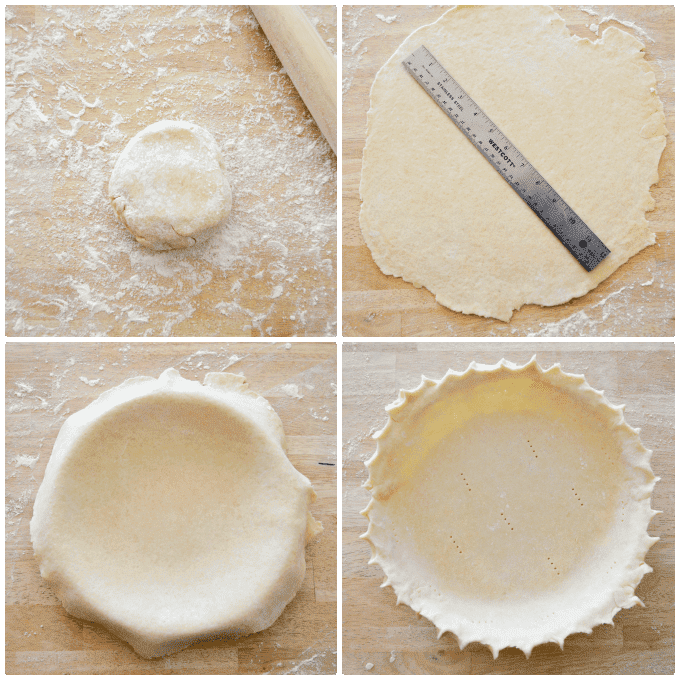
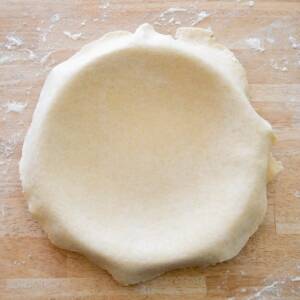
Rolling out the Dough
- Flour a flat clean open surface well and lay out your dough to begin rolling.
- You want your dough to remain chilled; if it’s too cold it will roll out cracking the whole time. You need it chilled just enough to be malleable. With practice you’ll get the feel for the right chill level.
- If your crust is cracking and rolling out funny, start over. Roll it back into a ball, flattening it slightly and put it back into the fridge for a few minutes to re-chill and roll it out again.
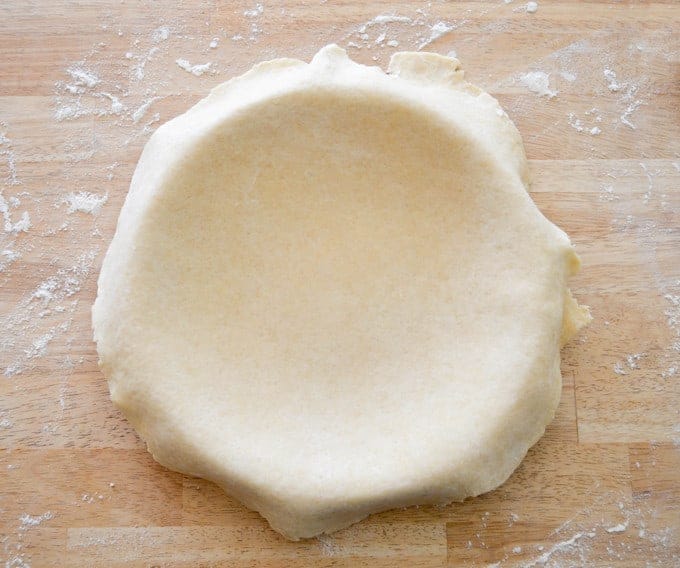
- Roll it out from the center out, going in every direction. Turn the dough every so often making sure it isn’t sticking to the surface and re-flour if necessary.
- You want your dough to be as evenly rolled out as possible, about 13″ inches in diameter.
- Gently transfer your dough to the pie pan with the help of your rolling pin or carefully fold in half not letting it stick together and then unfold over the pie pan.
- Follow the directions now for making your pie.


Comments
Comments are welcome & encouraged, however we have the right to refuse to publish it if it is hateful in nature and not constructive criticism. We ask that they be polite & stay on topic as well.