Elevate your culinary skills and take control of what goes into your ground meat. It’s easy to learn how to grind your own pork at home. It’s a game-changer. Grinding your own pork opens up a realm of possibilities, allowing you to customize the fat-to-lean ratio and experiment with a unique flavor profile. You will ensure the freshness and quality of your ingredients. I’ll walk you through the step-by-step process of grinding pork, share tips for selecting pork cuts and the benefits of grinding your own. Get ready to embark on a journey that will enhance your dishes and provide a satisfying sense of culinary accomplishment. Let’s dive into the art of grinding your own pork!

Selecting the Right Cut of Pork
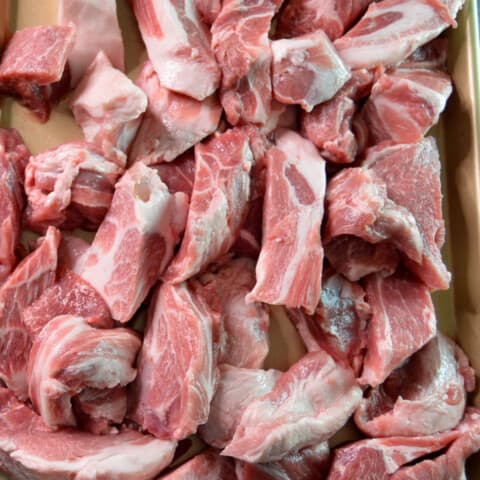
The cut of meat your choose will make or break your final product. My go to type of meat for ground pork is pork butt or pork shoulder. Feel free to experiment with different blends of meat cuts. The fat content on both of these is typically adequate to give you a good amount of fat for a proper fat to lean ratio. I personally like the fat to lean ratio of my ground pork to be at least 20%. If using a leaner cut like pork loin your ground pork will be dry once cooked and you will be quite disappointed in the final product. If you want to grind leaner cuts, you can always add additional fat to increase your fat ratio to make sure the lean meat doesn’t make your ground pork too dry. Reducing fat is all the rage these days, however, ground pork is not the best place to do that.

Benefits of Grinding your Own Meat
- Quality Control – One of the biggest benefits of grinding your own pork is knowing where it came from. When you buy pre-ground meat from the grocery store there is a good chance it has cuts of meat from a lot of different pigs. Often times these various cuts are trimmings tossed into a bin that may have been there for a bit. When I grind my own pork, I have total control of which cuts of fresh meat go into it. If you get your pork from a local farmer then you have even more control over your food safety. Always be sure that you are using the freshest and best quality meat that you can.
- Versatile Flavor and Texture Profiles – Be as creative as you want on the seasonings you add as well as the different cuts you grind. You’ll have a custom fat to lean ratio that also changes the final texture of your ground pork. Customize the flavor of your ground pork for meatballs, meatloaf, burgers, homemade sausage recipes, breakfast sausage, and more.

Essential Equipment
The obvious piece of equipment required to grind your own pork is a meat grinder. Meat grinders come in many different varieties and you will have to pick the best option for your own situation.
Meat Grinder
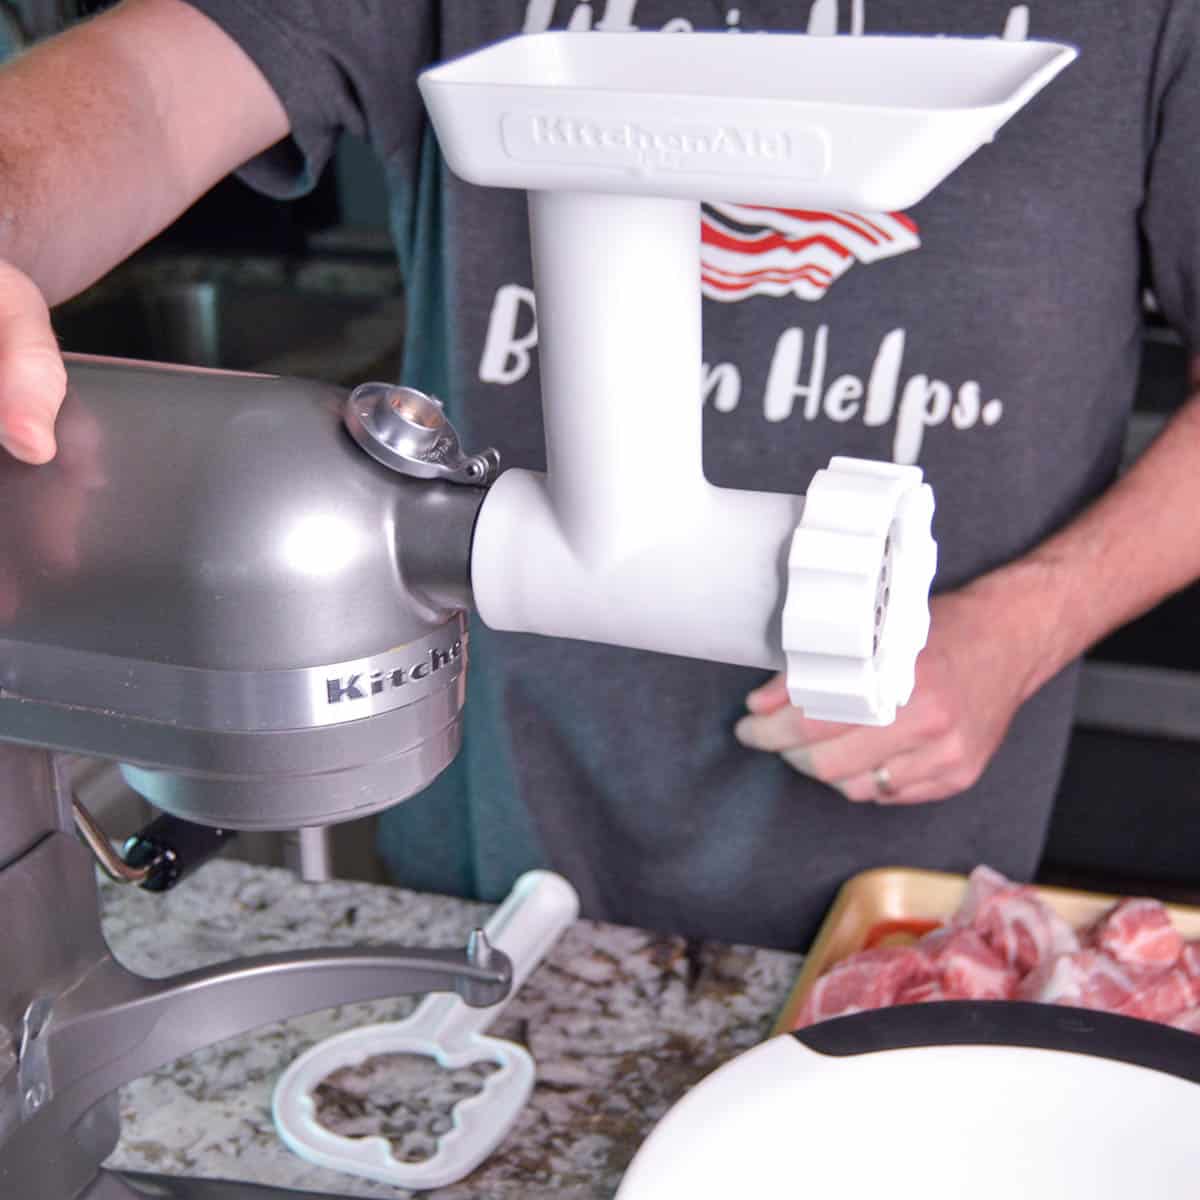
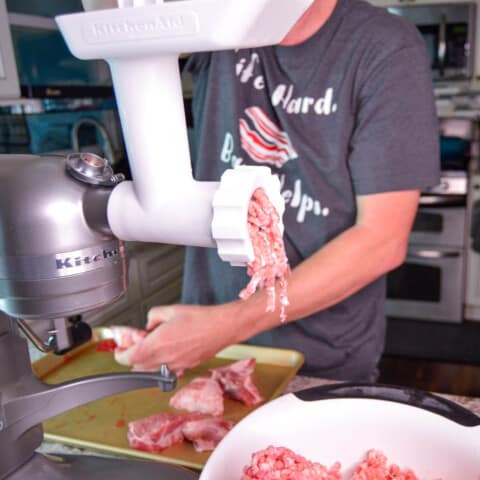
- Stand Mixer with Grinder Attachment – This can be one of the most economical ways to get started if you already have a stand mixer that can accept attachments. I have been using this method of grinding for about 15 years and it’s worked well for me. We received a KitchenAid stand mixer and grinder attachment as a wedding gift and have been using it every since. My meat grinder attachment has a plastic body and is nearing the end of it’s life but it’s served me well for a very long time. If you already have the kitchen aid stand mixer, this is a great way to begin your meat grinding journey.
- Electric Meat Grinder – For anything more than an occasional grind, you probably want to splurge on an electric meat grinder. These range from the basic starter grinders to serious pro grinders that can handle a lot of meat quickly! An electric stand alone meat grinder will definitely give you the best results and make it a pleasure to grind meat!
- Manual Grinder – I’ve never used one of these, but could definitely be used for a small batch of your own ground meat.
A Very Sharp Knife & Cutting Board
An often neglected tool in most kitchens is your knife, making sure it’s nice and sharp will make this whole process much easier and actually safer. The more effort you have to put into your cut, the less safe the cut is. Investing in a good knife and keeping it sharp will pay back dividends over time. My preferred knife for this application is a boning knife. If you are using a bone in pork butt the flexibility of the boning knife lets you clean the meat off the bone much easier.
Large Bowls or Container
Once the pork comes out of the grinder you need a clean container for the ground raw meat to drop into. The container required will vary depending on how many pounds of meat you plan on grinding. I usually grind in fairly small batches and use a large metal mixing bowl. You can use whatever you have available or multiple bowls. If you plan on grinding a large batch, you might want to invest in a meat lug. These are plastic food safe tubs that can hold 30 to 50 pounds.
Sanitizing Supplies
One step that you can’t skip is proper sanitization, this is critical to food safety since you are working with raw meat. All of your equipment must be thoroughly cleaned and sanitized before and after use to ensure no foodborne illnesses.
Grinding the Pork
Grinding your own pork or any home-ground meat is easy but a little bit labor intensive, especially if you are doing a very small batch. You will want to have all of your equipment and the meat prepped ahead of time to make this go smoothly.
Preparing the Meat
- Freeze your grinder parts – Keeping the meat grinder parts super cold greatly helps the final product. If everything is warm, it ends up being more squished pork than ground pork! Put all the parts that the meat will come into contact with in the freezer for at least 30 minutes. I assemble all of the parts into the grinder body and put the whole thing into the freezer. These are all the parts that come off to be washed, not the motor assembly!
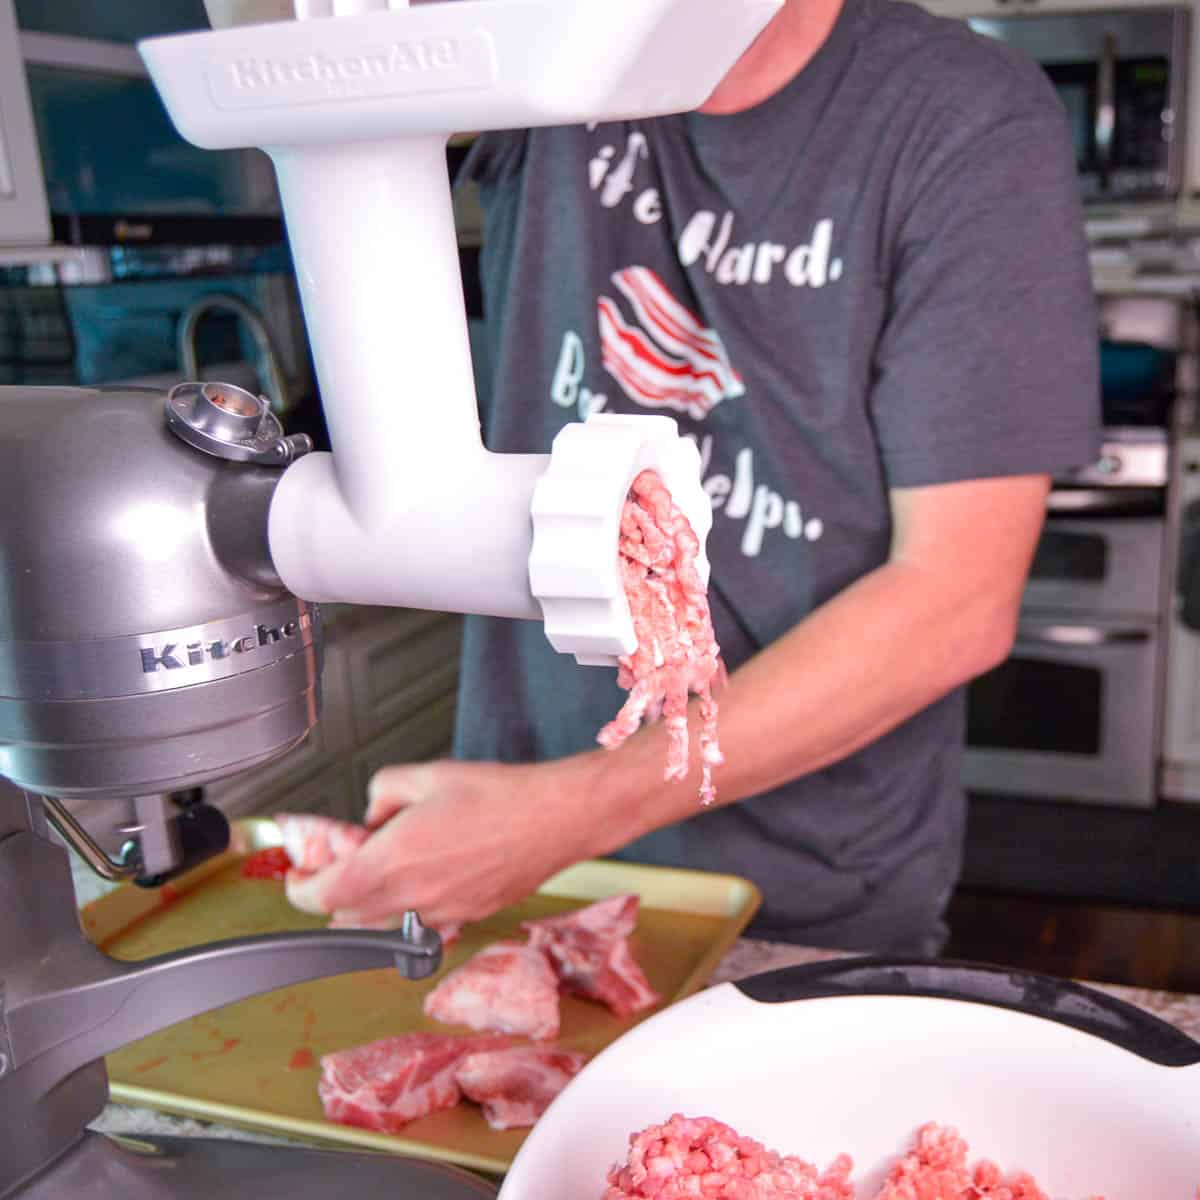
- Cube your pork – You want to trim off any undesirables and then cube your pork up into chunks that will fit into your meat grinder. The trimming process is fairly minimal on a pork butt since you don’t really want to get rid of much fat. I usually cut my chunks of meat into approximately 2″ by 4″ chunks because this fits well into my grinder. If you have a more powerful grinder than me, you can determine your chunk size based off of what it will handle. While you are cutting up your pork, discard any bits of connective tissue, bone or silver skin you come across.
- Get Your Pork Super Cold – I put my cubes of pork on a baking sheet in a single layer and put it in the freezer for 15 to 20 minutes to get it super cold to firm it up. You don’t want it frozen or it won’t grind and could damage your grinder, just nice and firm.
The Grinding Process
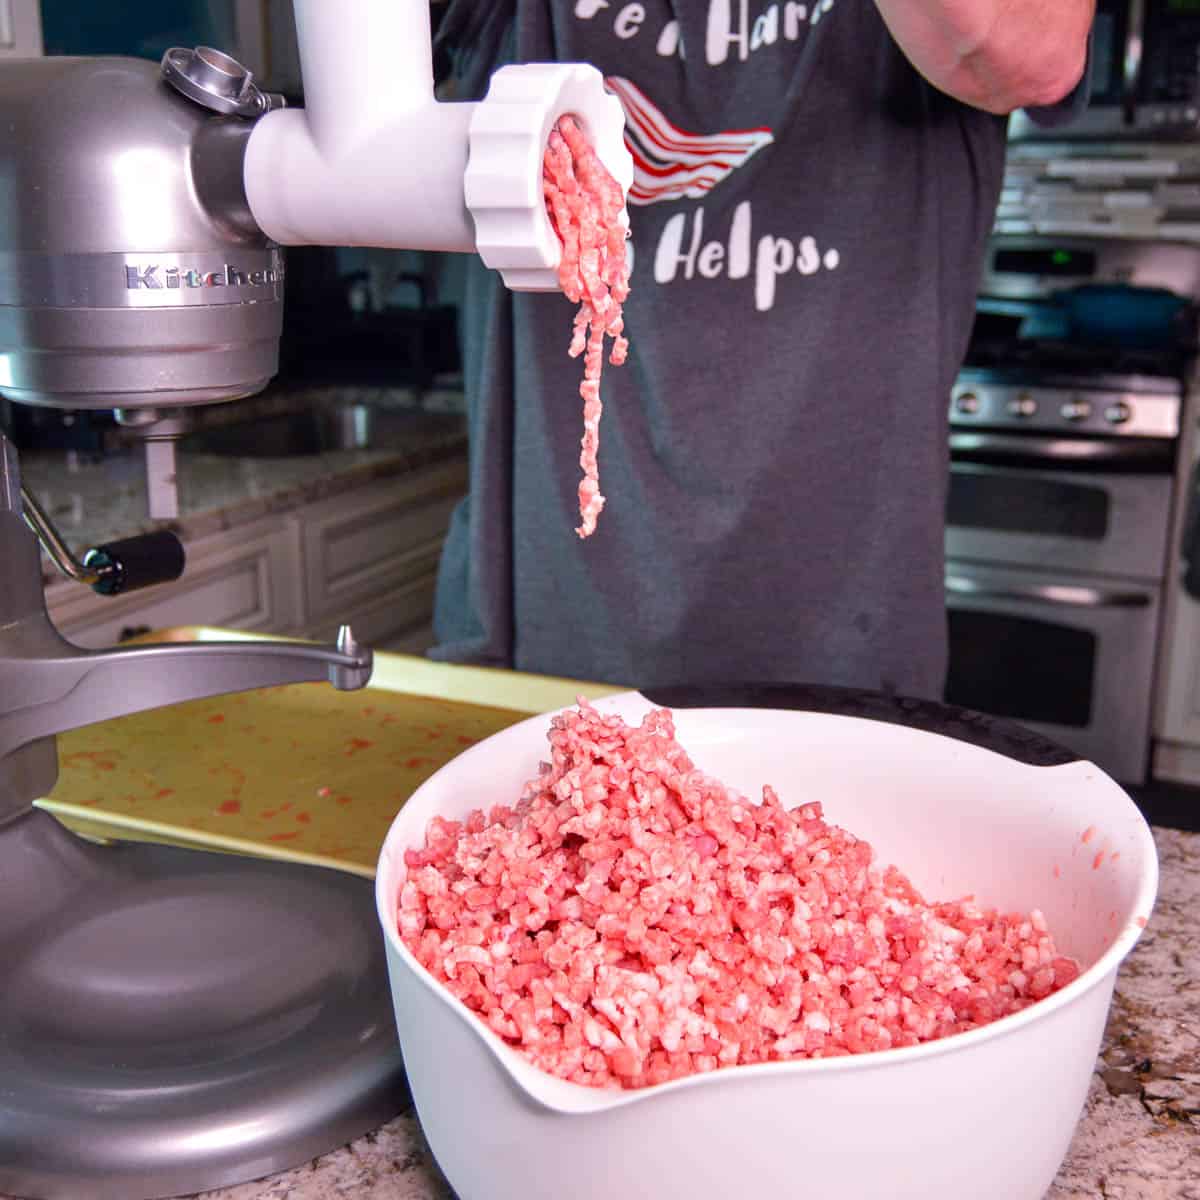
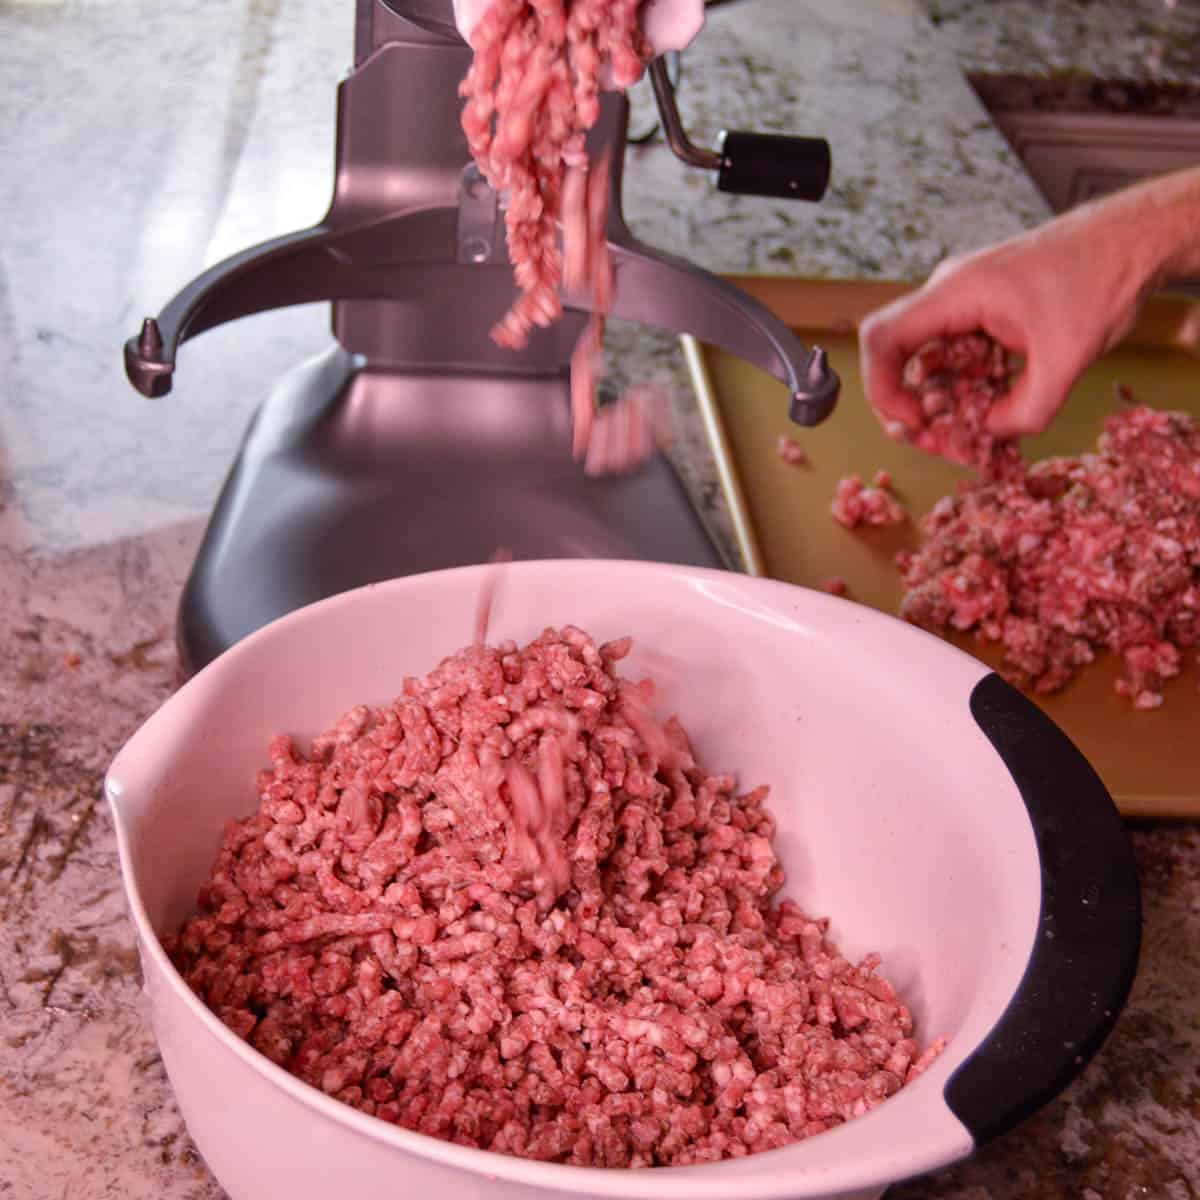
First grind – This is the initial pork grind which will be slightly coarse and not the proper texture for breakfast sausage. If you are looking for a coarser ground pork this could be your only grind. My personal preference is to go for a double grind to give the ground pork the texture that I like best. I use a 1/4 grinding plate which I find gives the best texture.
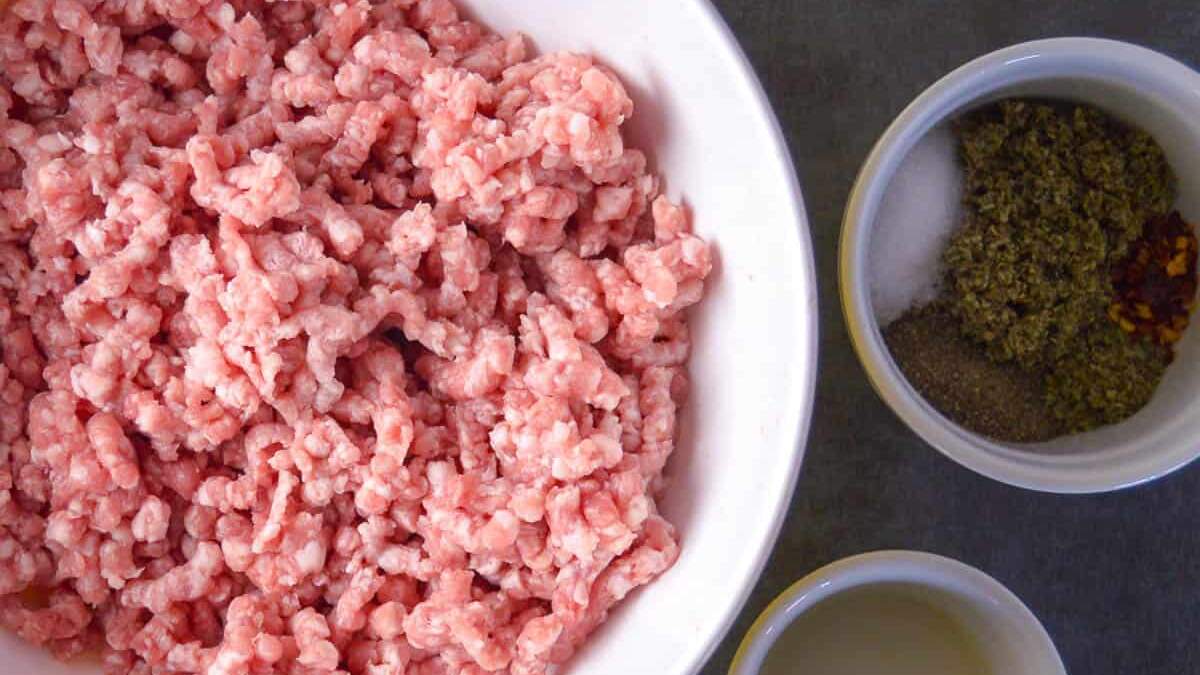
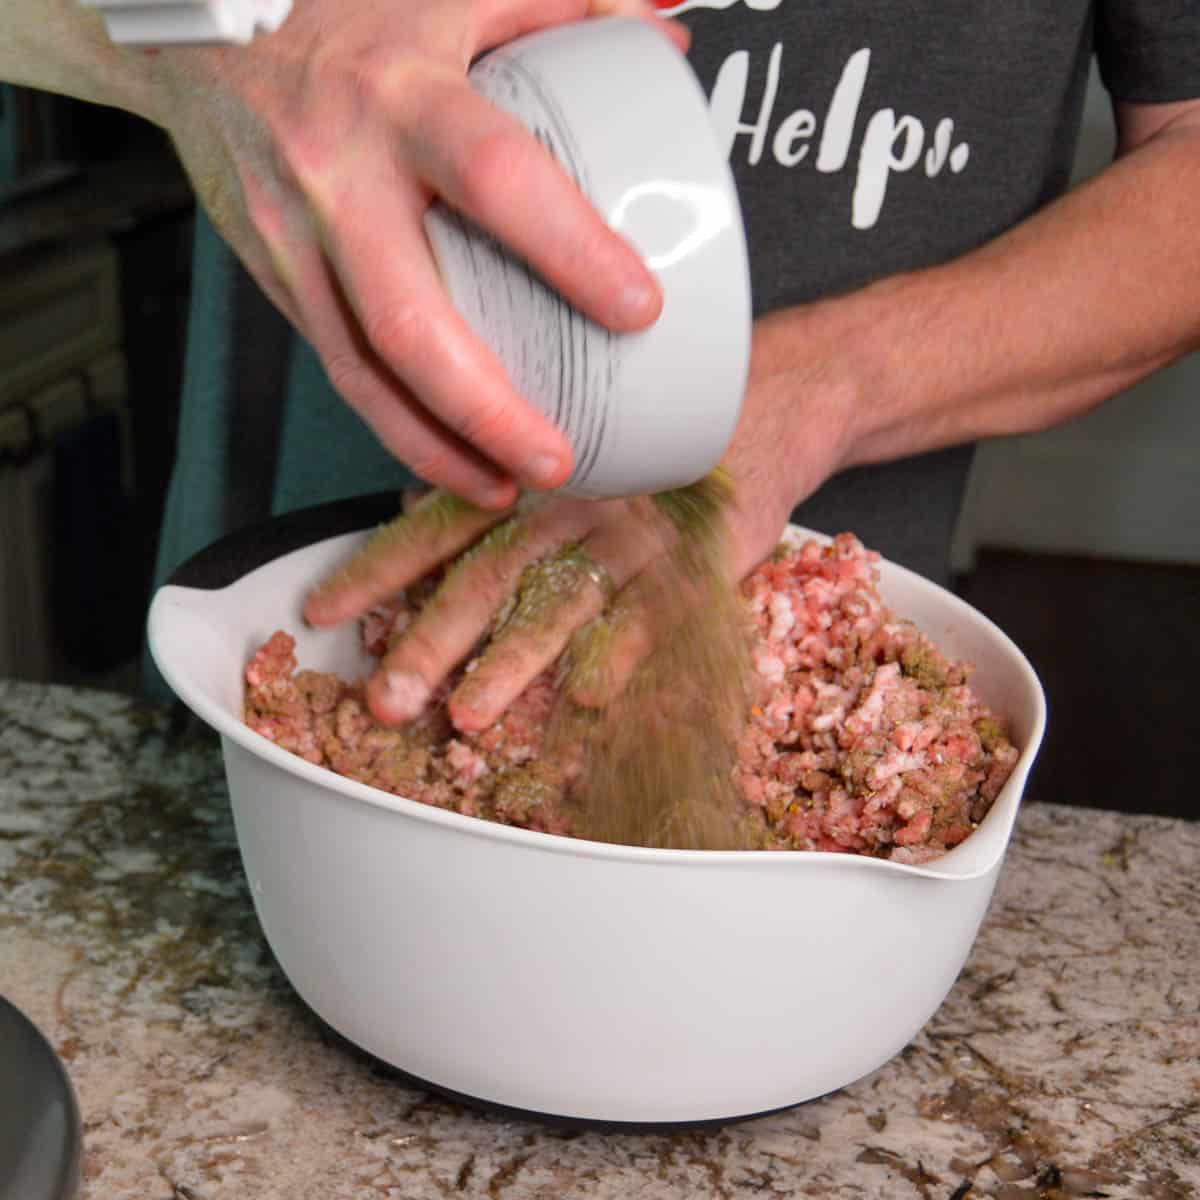
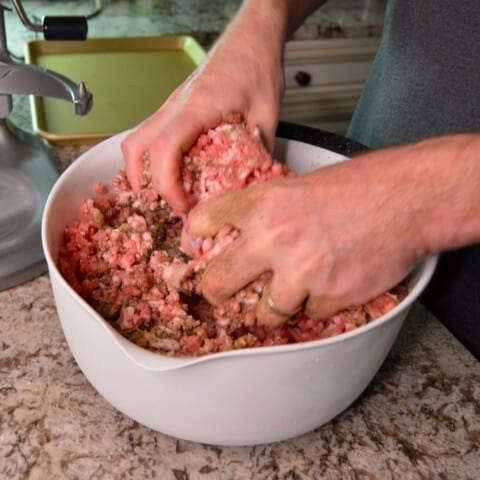
Mix in seasonings – If your final product is a seasoned sausage, add the seasonings between grinds so the meat grinder helps distribute the seasoning in the final grind. Sprinkle all your seasoning on the coarse ground sausage and give is a mix by hand. The grinder will thoroughly mix it all in the next step.
I think the camera made Josh nervous. 😂
Final grind – Put the coarse ground pork back through the grinder one more time for a smooth and proper texture for country breakfast sausage or most other sausages. A double grind gives you a finer grind. If you are looking for a coarser grind for your final product, you could skip the double grind step.
In conclusion, grinding your own pork is a great way to ensure the highest quality in your meals and create the most flavorful dishes. With the right tools and techniques, you can easily learn how to grind pork safely and efficiently. Plus, you know exactly what is in your ground meat. So, don’t be afraid to give this meat grinding method a try! As the saying goes, “nothing tastes as good as homemade,” and that certainly applies to freshly ground pork. Bring out the flavor and freshness of your pork by grinding it yourself—you won’t regret it!
How to Grind your own Pork (Using Grinder Attachment)
Equipment

Instructions
- Freeze all internal parts of your meat grinder attachment. This includes the coarse grinding plate, blade, auger and tray. You want these ice cold to give a good grind and not end up with a kind of smashed up end product. Word of caution: this is a critical step to ensure success.
- Cut your pork into chunks. Since I have a fairly low powered grinder, I cut them about 2" by 4". You need them small enough that they will fit down the throat of your grinder. If you are lucky enough to have a nice powerful grinder, you can leave the chunks bigger.

- Put the pork chunks in the freezer for about 15 to 20 minutes or until they firm up some. You want them firm but not frozen. If you cut your pork chunks larger then adjust the freeze time to get them firm. I put them on a sheet pan and cover them loosely with plastic wrap.
- Remove your meat grinder attachment parts from the freezer and assemble your meat grinder once your pork is firm and you are ready to grind. Place a large bowl or other container, adequate size to catch all of the ground pork under the grinder.
- Turn your meat grinder on high and start putting the meat down the throat of the grinder per your meat grinder's instructions. Use the stomper to push the meat through gently if the grinder isn't pulling it through on it's own. Some more powerful meat grinders should not be started empty, so keep that in mind.
- Process the entire batch of pork through your meat grinder, catching it in your clean container. This completes the first grind of the pork.
- (You Can Skip This Step if you want Standard "Ground Pork" not "Sausage.") Sprinkle whatever sausage spice mixture you are using onto the ground pork and then add any liquids needed and mix by hand. Mix the pork mixture fairly well but don't worry about perfection. This will disperse the seasoning and the pork fat more evenly throughout the sausage mixture. (At this point if the pork has started to warm up, you may want to put it back in the freezer for another 15 to 20 minutes to firm it up again. You may not need to do this step if you're working quickly.)
- You are now ready for the final grind of your sausage. Put another bowl or container under the grinder to catch the finished country breakfast sausage.
- Turn your grinder on and feed the seasoned coarse ground pork through your meat grinder once again. I have found the best way for me is to grab a small handful and form it into a cylindrical shape that I can drop down the throat of the meat grinder, pushing gently with the stomper if necessary.


Thank you so much for the process. I pay $4.25 for 1 pound of Mild Italian Ground pork and see I can purchase 7.5 pounds of shoulder for 1.99 per pound. Impressive!
Erich, You’re very welcome! It does pay to grind your own pork; you know better what’s in your sausage and it saves you money. It’s a win win!
I got a meat grinder attachment for Christmas. Now know what to do with it!
Sweet, Heather! Hopefully you can enjoy some freshly ground and seasoned meat soon. Enjoy!