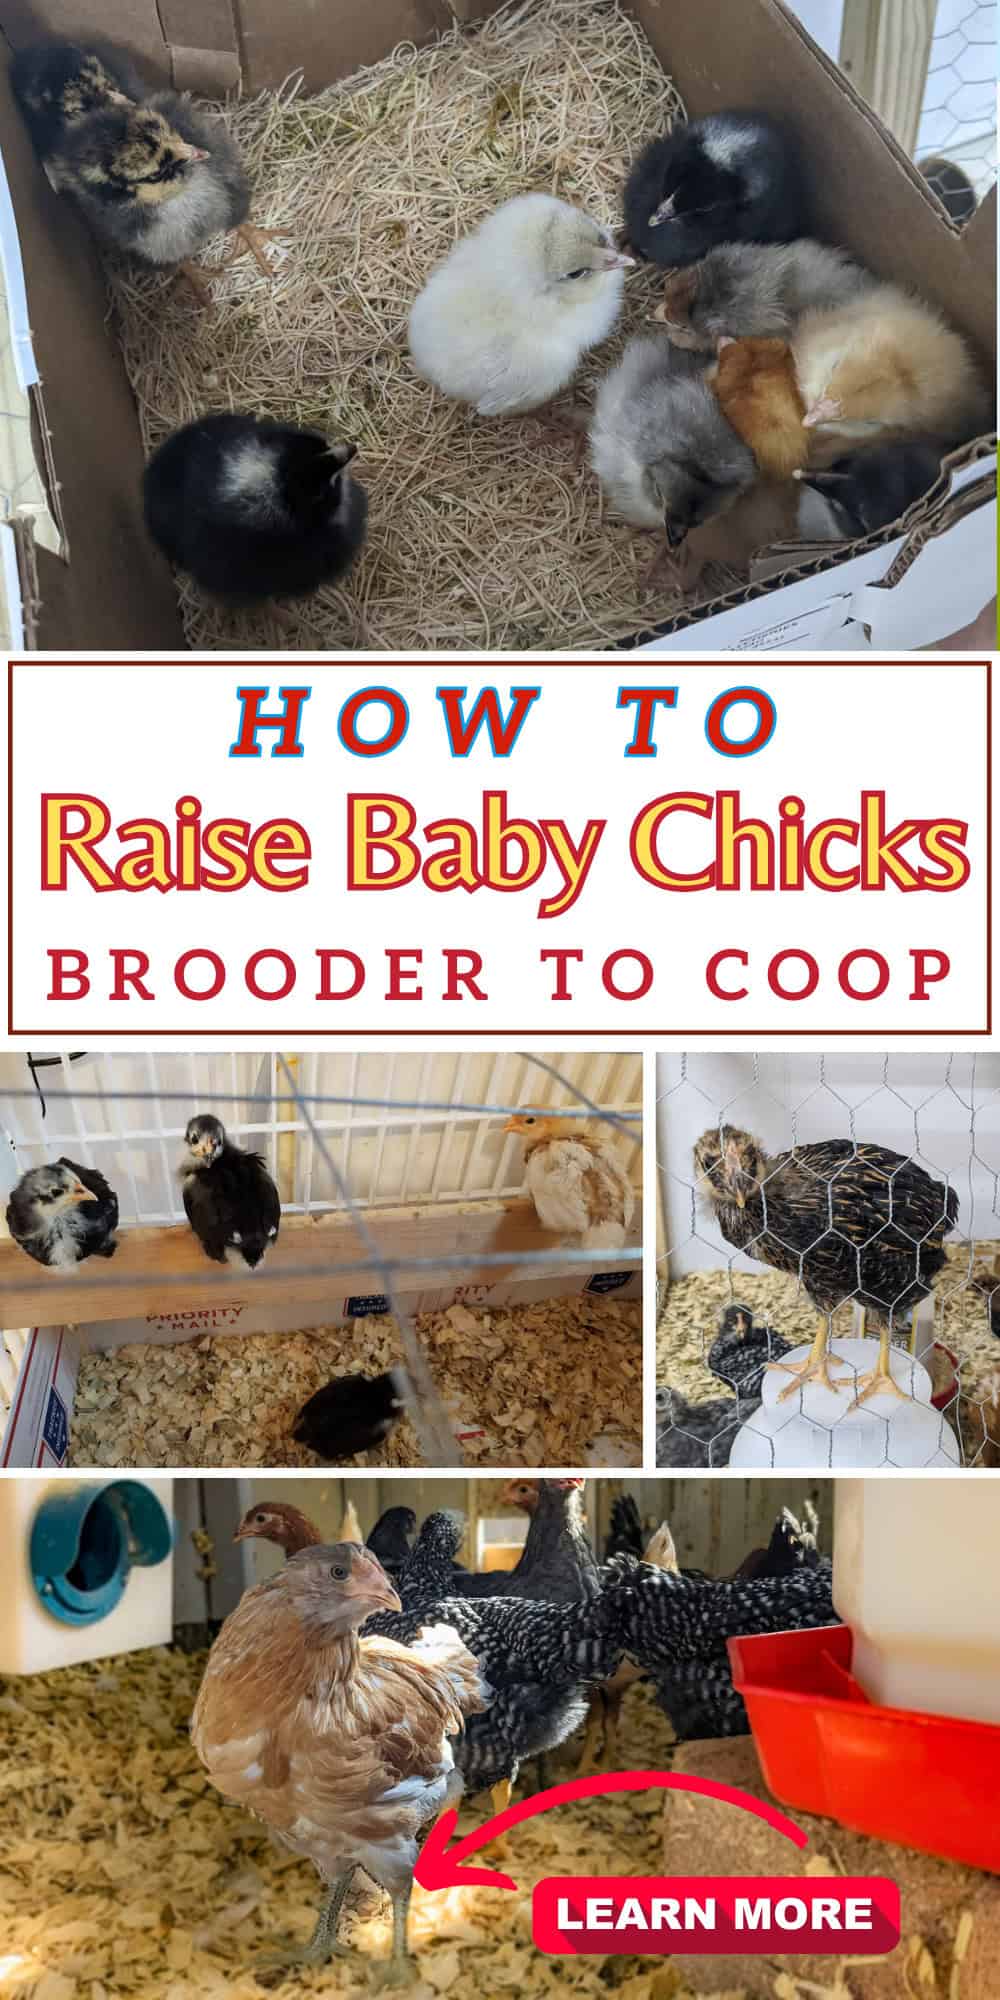
This is a post I’ve been wanting to write for a long time! How have I not covered raising baby chicks already? I did briefly touch on it in our beginner’s adventure, and again in our favorite cold hardy breeds, but I think it’s time for me to cover the brooding basics in-depth. There’s nothing like having brand new life on the homestead. Raising day old chicks is pretty straightforward, but you have to have some knowledge in your back pocket to be successful. It sounds like a lot at first, but I promise, once you get your baby chicks out of the “chickhood” phase, your flock will be pretty self-sufficient and low maintenance. Plus, you’ll have a constant supply of farm fresh eggs year-round!
Where to get you new Chicks
We personally recommend getting chicks from a Hatchery vs a local pet store. You don’t know exactly where or what environment those store-bought chicks came from. There are great hatcheries all over the country that will ship the chicks to you same day. The hatcheries take great care and pride in their birds and want your birds to thrive in their new home.
We have experience with a local hatchery and Myers Poultry on the east coast that will ship you some awesome chicks you can pick out online. Do your research and order from a reputable source like a hatchery.

Our Journey Raising Day-Old Chicks
I started my chicken keeping journey back in 2018. It seems like ages ago now, but I remember brooding our very first flock, and what a rewarding experience it was for me and my family. We always knew we wanted to raise backyard chickens, but my husband and I wanted to wait till we had the perfect setup to raise them.
We started with just two Easter Eggers given to us by a family friend, which then quickly turned into an additional 11 chicks we ordered from a local hatchery. Ever since, we have enjoyed all the fun that comes with raising and keeping backyard chickens.
Now, as for the reason I started thinking about chick brooding more recently—13 is the number of chickens we like to keep at a time, as it seems to be the perfect number of chickens for us. Unfortunately, we recently suffered two unexpected losses due to predators. Loss is an inevitable part of keeping chickens, especially if you choose to free range them like we do.
As we consider whether we want to add more to our flock next spring, I thought this might be a good time to write about raising baby chicks, since we may potentially be brooding again next year. Follow these tips and you’ll be brooding healthy day-old chicks in no time!
The Best Chick Brooders
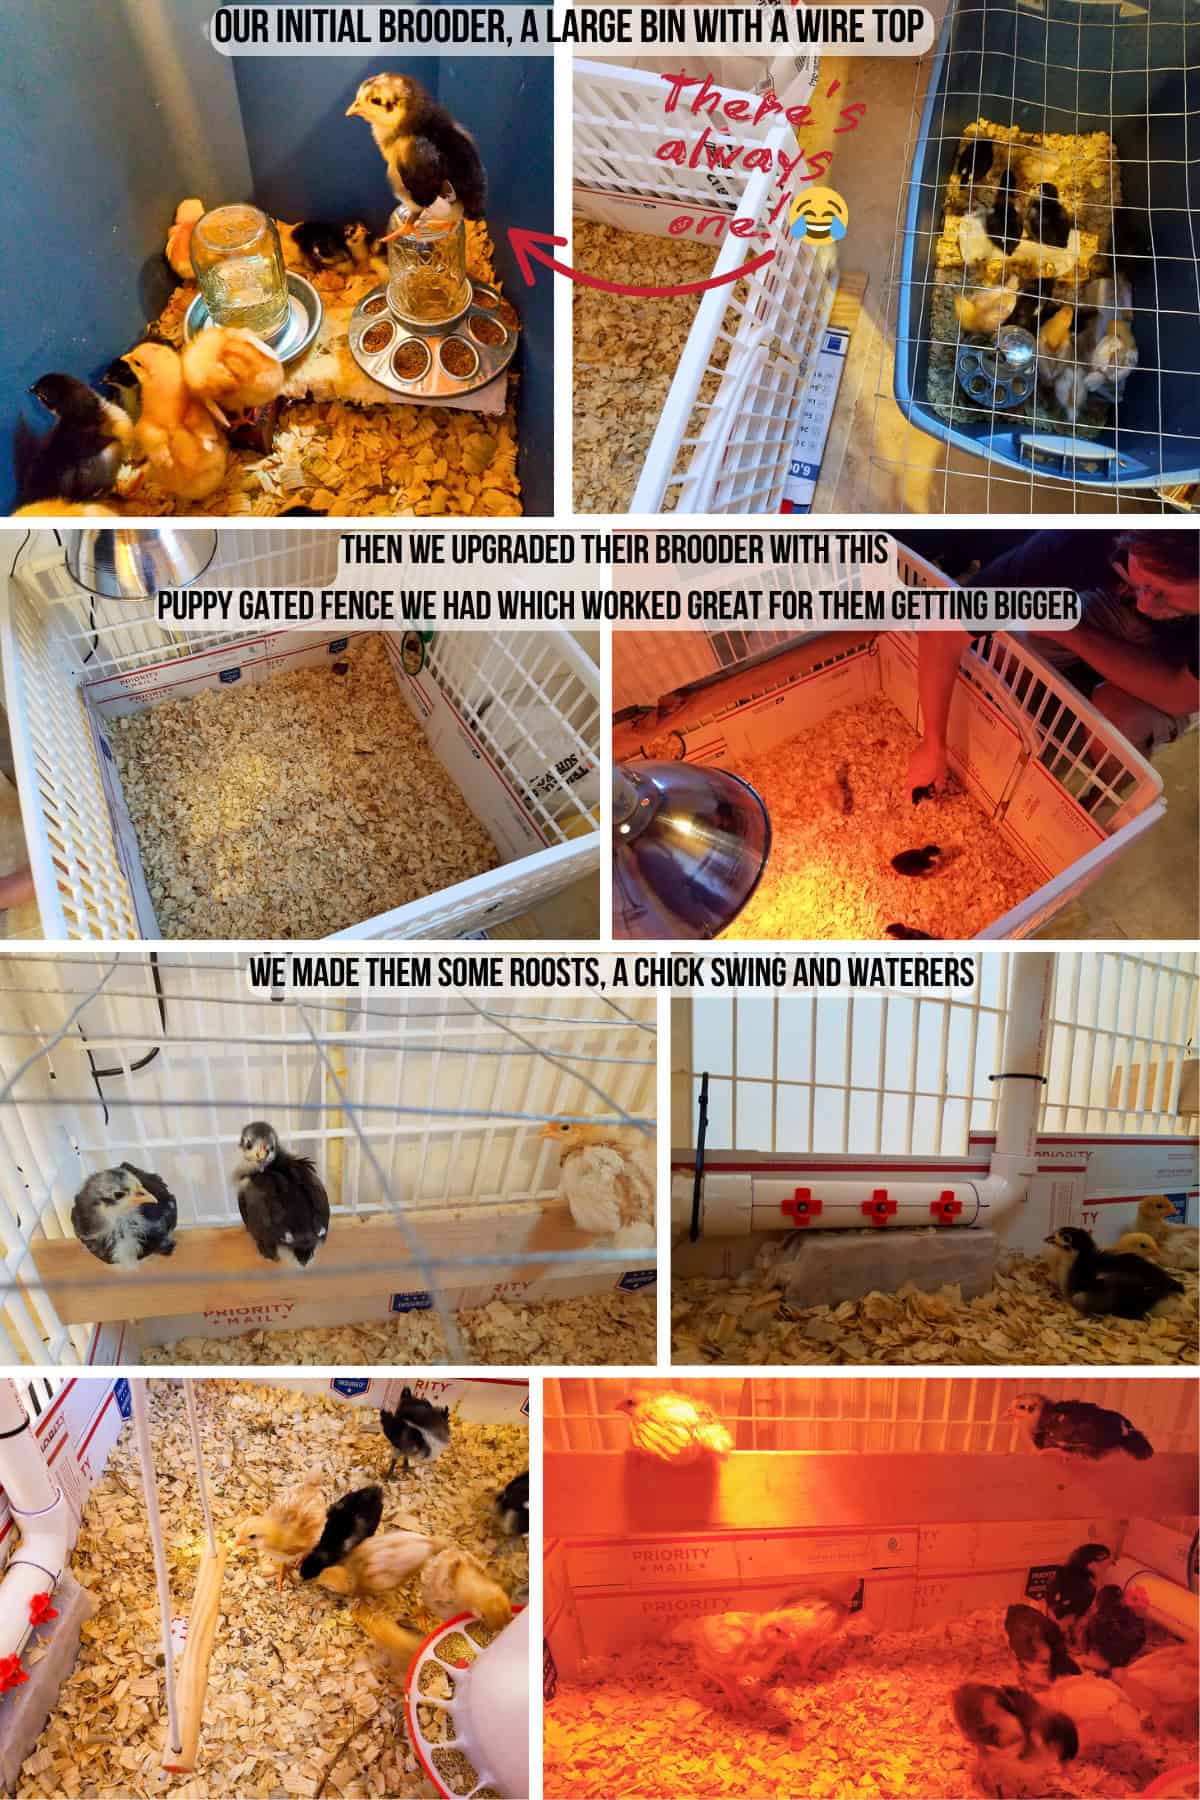
Before your chicks can safely live outside, they need to spend at least 6-8 weeks in a chick brooder. While you can certainly buy a brooder from an agricultural store, we went ahead and made a DIY chick brooder ourselves. It’s much cheaper and just as effective as buying one from the store. Your chicks are going to outgrow it very quickly anyway, so keep that in mind before you go out and buy something really expensive.
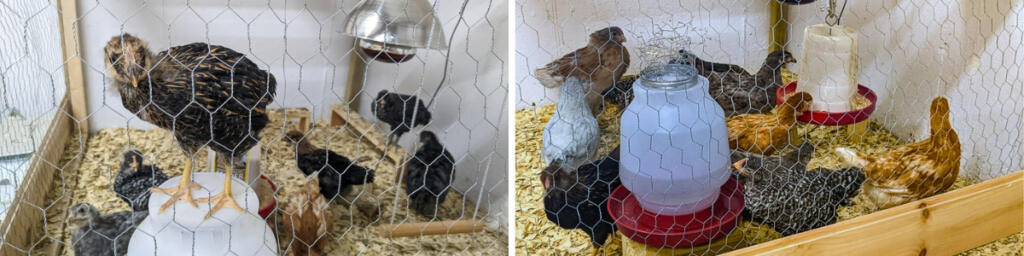
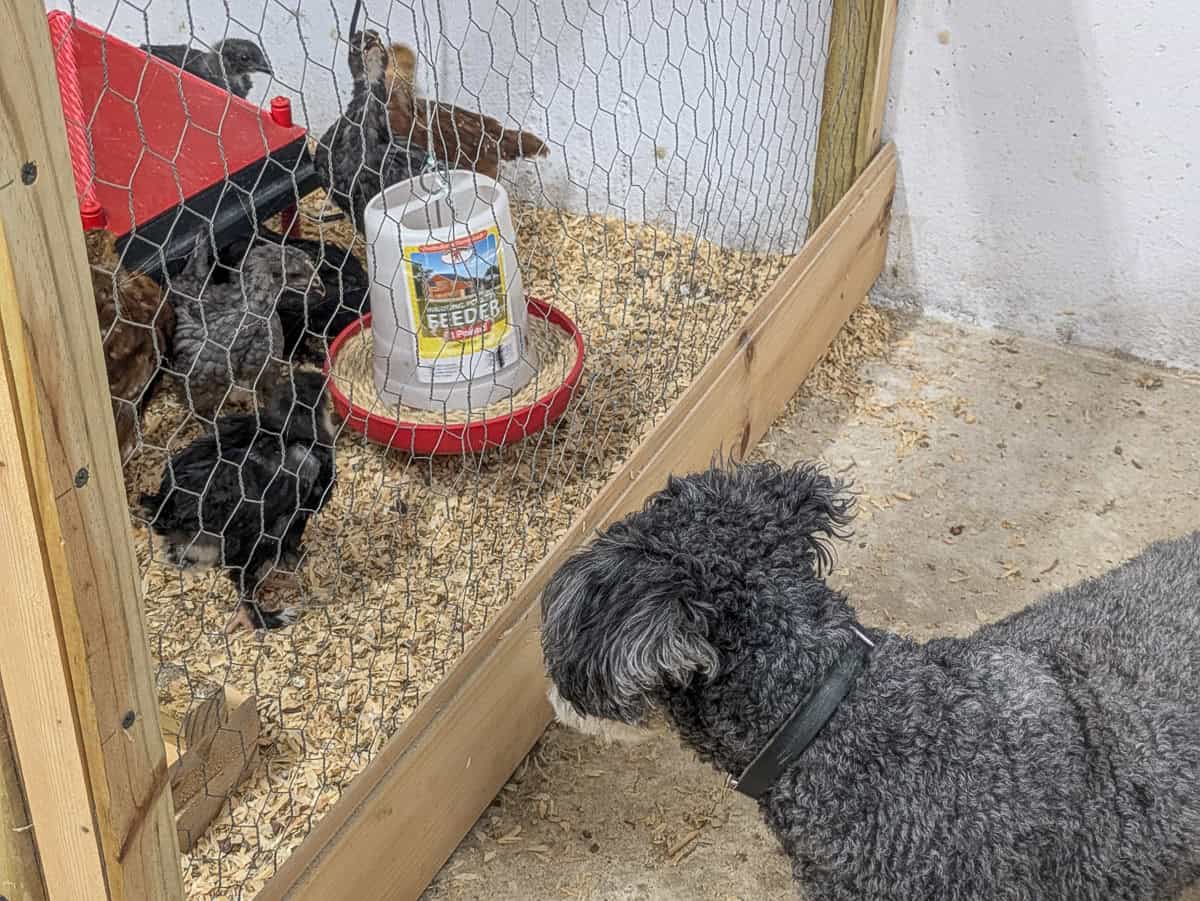
We chose a large plastic tub with high sides to keep them from escaping, and an open top for good ventilation. If you choose something with lower sides, make sure you cover your brooder with a mesh screen to keep curious birds from escaping.
Other good options for a DIY chick brooder would be a plywood box or a stock tank. Just make sure there is good ventilation. Rounded corners are also a good thing to consider, as baby chicks do have a tendency to pile into corners and suffocate. A brooder ring inside your enclosure can help with this too. You can keep your brooder in a barn or a basement, as long as it isn’t too drafty. We don’t recommend you put your brooder in a high traffic area of your house, as they can be quite smelly and noisy!
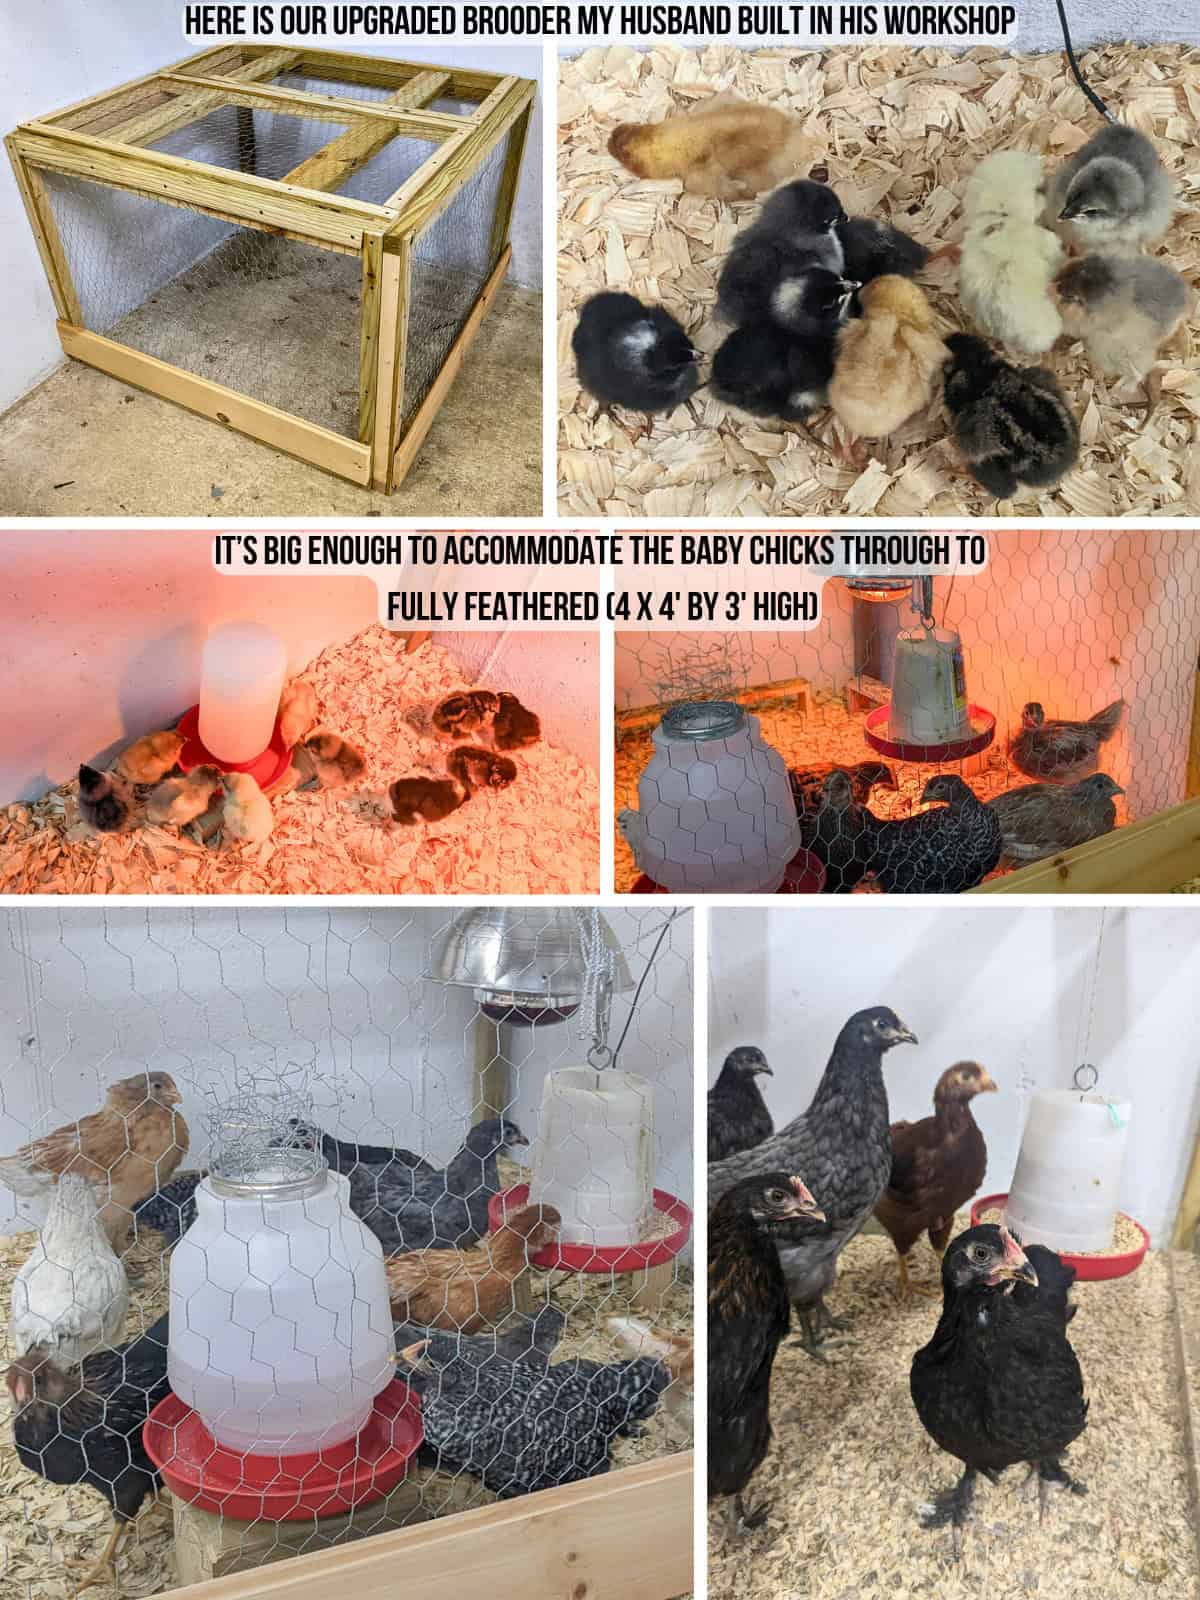
When you are just starting out with your chicks, you actually don’t need a lot of space for them. It’s recommended to have at least ½ square foot of space per bird. But keep in mind, they will grow very fast, so their brooder space will have to grow with them.
If you have children at home and you’d like to keep your brooder inside, it’s always good to teach your little ones how handle birds safely.
(The top is half stationary, other half has a removable panel for easy access)
Upgraded Chick Brooder
While we initially stuck to a pretty simple approach for our first batch of birds, in 2022 we decided to upgrade our brooder and put it in my husband’s workshop. We wanted to create a designated space for us to raise chicks, and this area cleans up easily.
Since we don’t have a barn or any room in our basement, this was the perfect solution for us. To really optimize the space, we created a brooder we could take apart and rebuild easily when any new batch of birds comes in. That way, Josh doesn’t feel like he’s losing any space in his workshop!
Keeping Your Chicks Warm
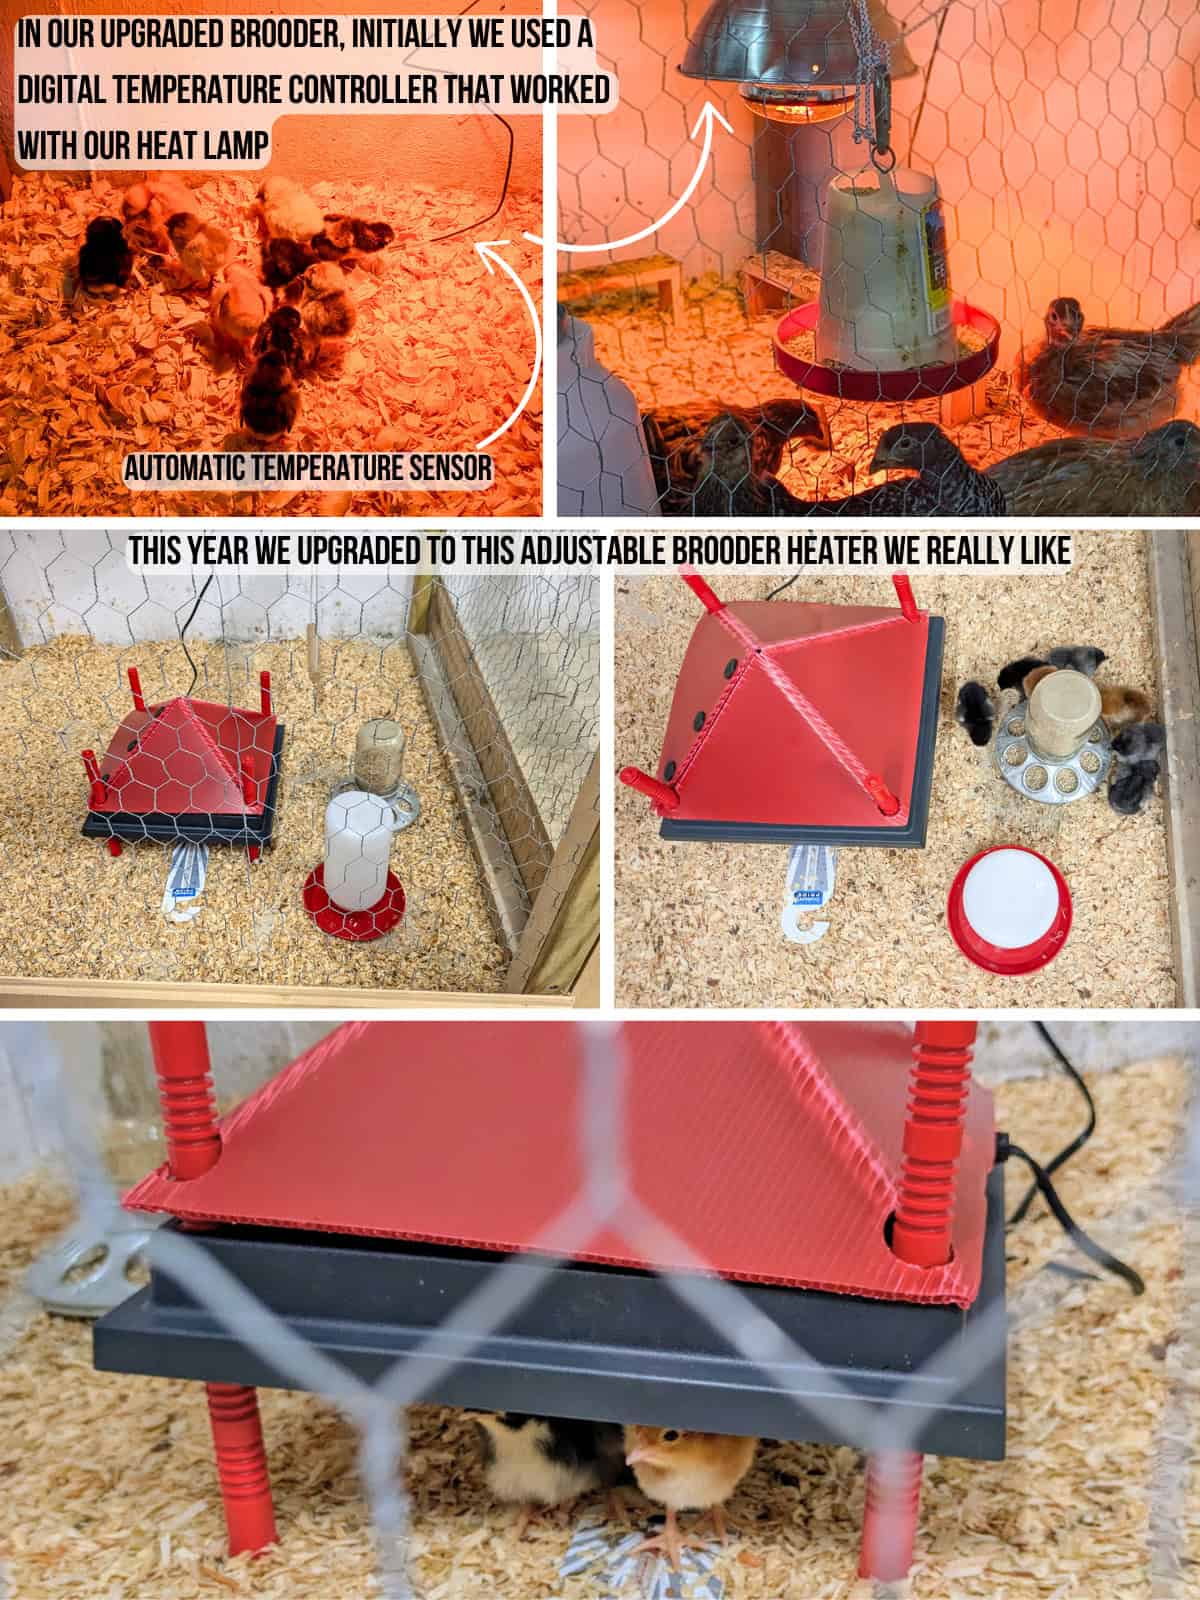
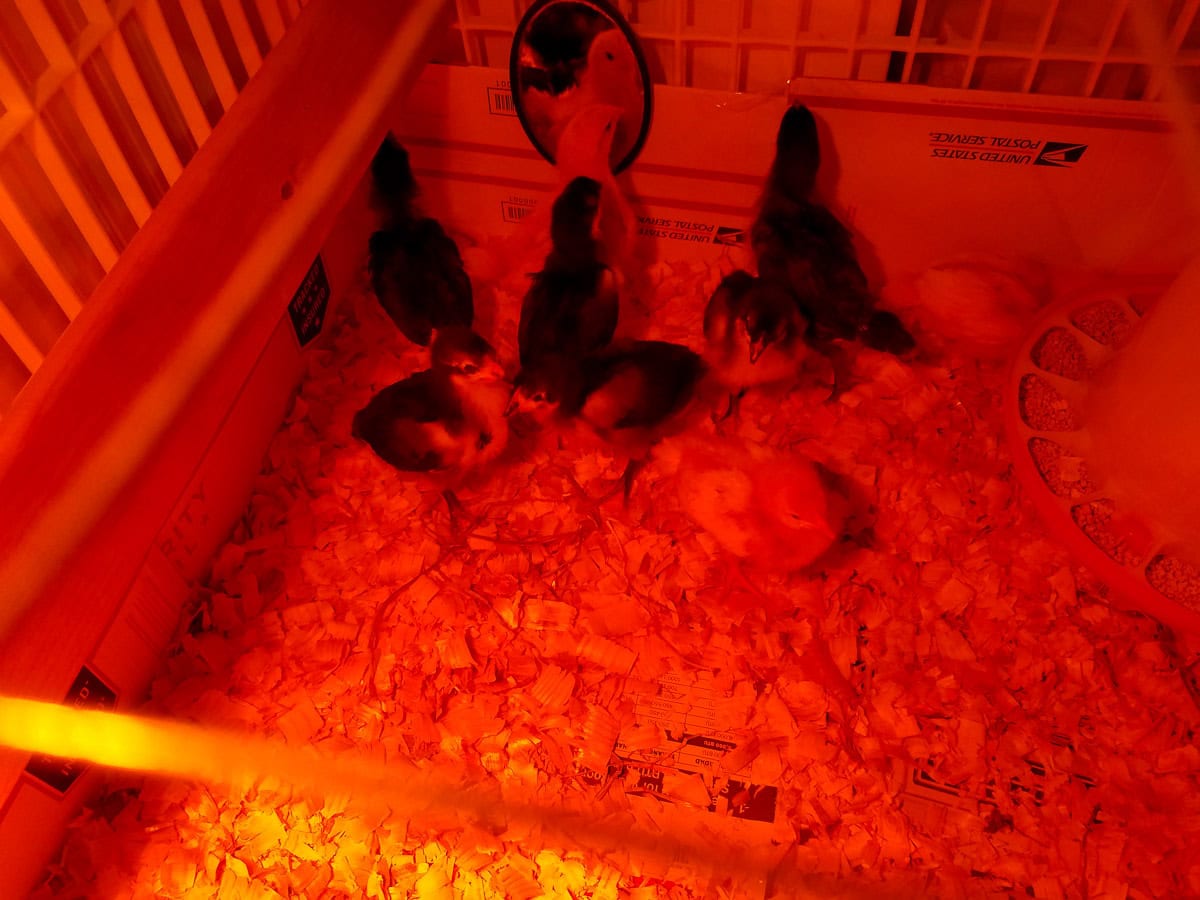
Aside from the brooder itself, it’s really important to consider what kind of heat source you want to use for your chicks, as they will need artificial heat to survive the first few weeks of life. Why is that? Well, baby chicks cannot regulate their body temperature till their adult feathers start to grow in. So, you have to keep their brooder space very warm—starting out at 95 degrees! This may seem like a lot, but your baby chicks would normally stay very warm from their momma’s body heat. Here’s a baby chick temperature chart to give you an idea what the ideal temperature should be week to week.
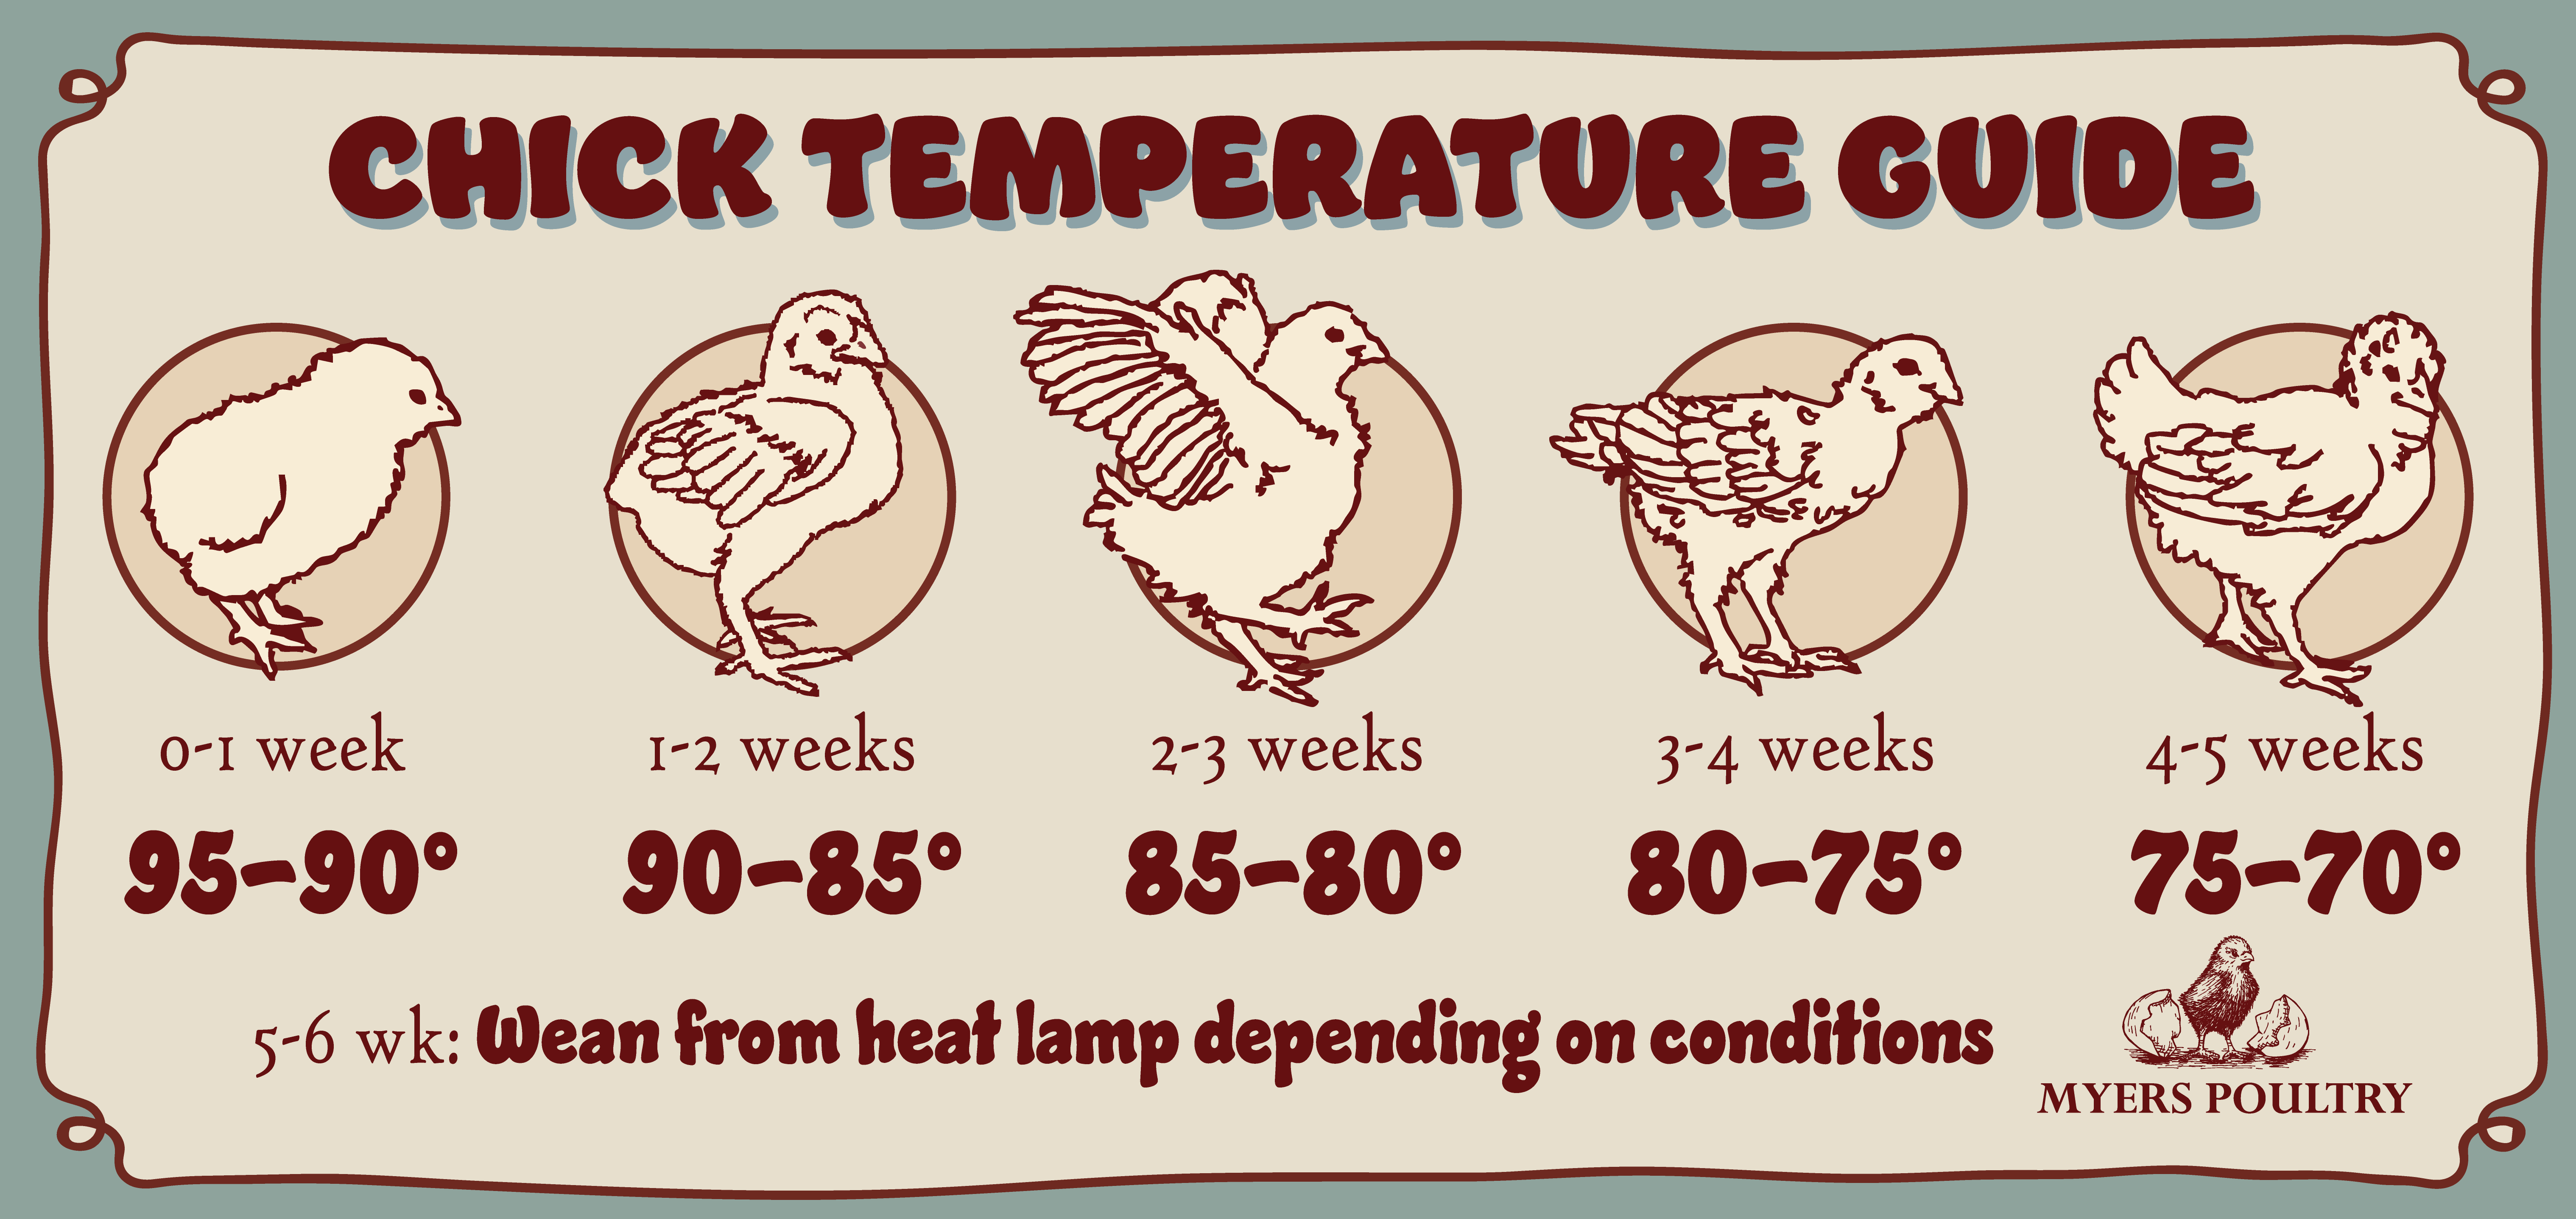
Weaning off Heat
You can start weaning them from the heat lamp around 5-6 weeks, but till they reach that age, you should keep your chicks warm with supplemental heat. We used a red heat lamp with a temperature sensor to help us take the guesswork out of it. While we liked the heat lamp, this year we upgraded our brooder warmer to an adjustable heat plate from RentACoop. It worked great for us!
And if you’re wondering how you’ll know whether chicks are warm or cold…they will tell you! Chicks are a noisy bunch (well, noisier than usual) if they are cold. Cold chicks will be all huddled together in one spot of the brooder. If they are happy, they should be evenly spread out and eating and drinking normally. Just make sure you follow best practices when it comes to supplemental heat—never hang a heat lamp by the cord, as that’s just asking for trouble. Always follow good heat lamp protocol to avoid fire hazards!
Keeping the Brooder Tidy
As a total beginner in 2018, I didn’t know what I was getting into the first time I raised chicks. They were shockingly messy! I didn’t realize such cute, tiny creatures could create such a big mess, but trust me, they will. It’s important to check your brooder space multiple times a day, as your chicks will get shavings in their waterer and chicken feeder. Their water station can mold easily and make your chicks ill if it isn’t cleaned.

Be sure to clean your waterer every single day and maintain their chicken feeder as well. Baby chicks also generate a lot of waste. Believe me, these little guys poop a lot. So, you’ll need to be prepared to clean out your brooder often to keep that harmful ammonia from building up. You should spot clean your brooder a few times a day by removing any wet or soiled shavings. A full clean out should happen maybe every 3-7 days, depending on how many chicks you have (and how messy they are). A clean and sanitary environment will make a big difference for your chicks. Don’t skimp on this part!

The Best Bedding for Baby Chicks
There are actually very few suitable options out there that are good for baby chicks. The reason for that is they have sensitive respiratory systems, so you have to be careful what you put in the brooder. Bedding options like cedar shavings and sawdust could make them sick due to oils or dust that may cause breathing difficulties. We don’t recommend newspaper either, as it’s too slippery for baby chicks to stand on.
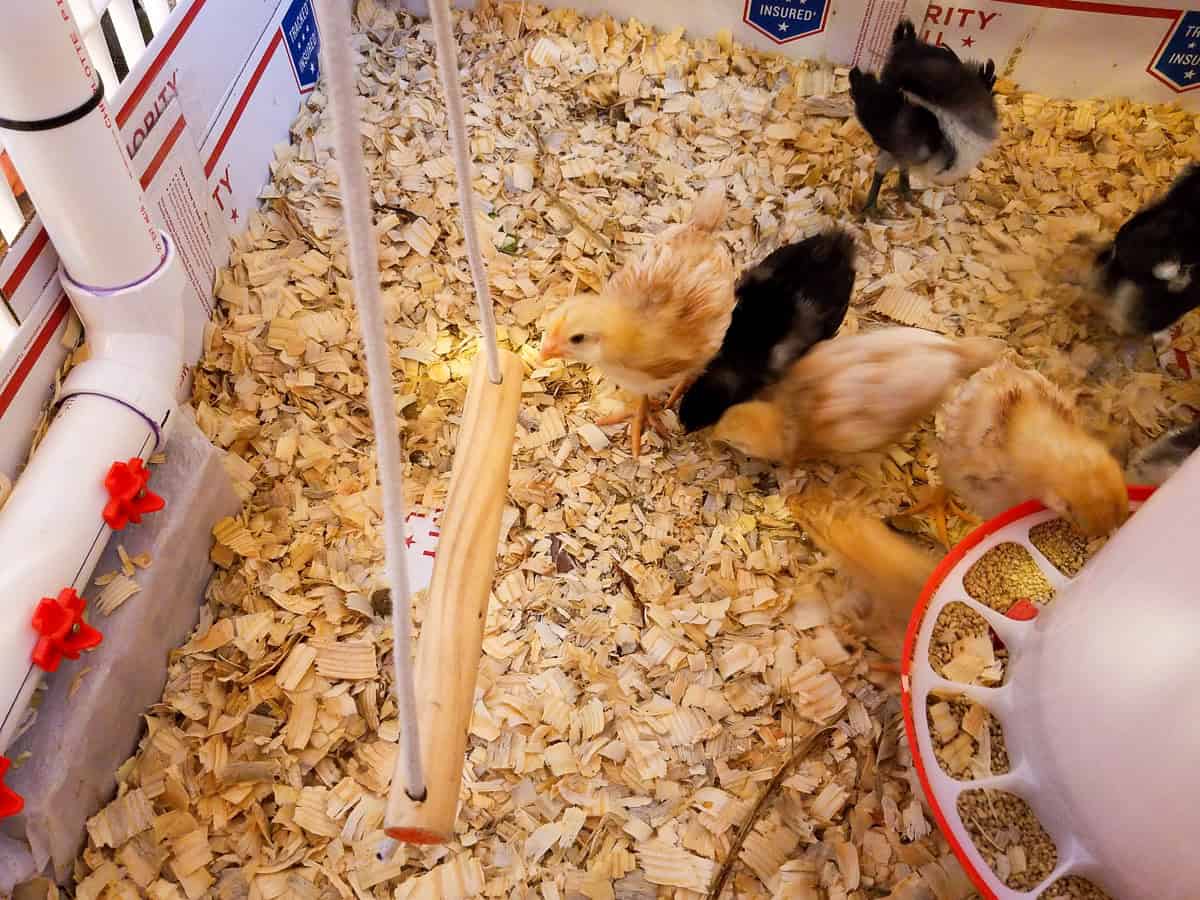
Pine wood shavings are really the best option for the floor of the brooder. You can find bags of them at your local farm supply store. They are absorbent and inexpensive. Just make sure to check your pine shavings for mold or mildew before laying it out in your brooder. I recommend looking for pine shavings vacuum sealed in plastic, as they are less likely to mold. You want your chicks to have adequate traction, so lay out your pine shavings at least 2 to 4 inches thick to give them some cushion. You can throw in some paper towels or even puppy pads now and again for easy clean up, but keep in mind these will get dirty quite quickly.
Checking for Pasty Butt
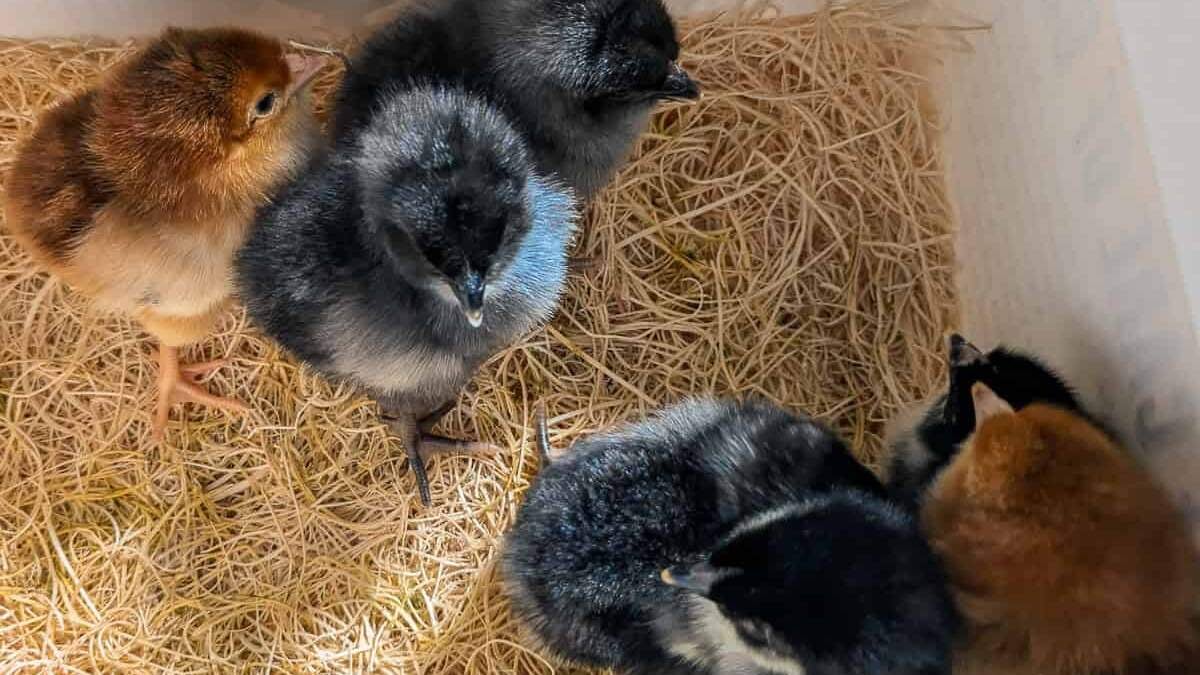
The very first thing we do when we open up the box and check out our new chicks is check their cute little fuzzy butts. Yes, really! There are a few common ailments you should watch out for in your baby chicks, pasty butt being one of the big ones. I highly recommend checking your chicks as soon as you get them home from the post office or pick up!

Pasty butt happens when a chick’s vent area (aka, their little butt) gets clogged with dried waste. If you don’t clear it, the chicks will be unable to expel any new waste and die. Whenever we get a new batch of chicks, my husband and I always inspect their bottoms to make sure they are nice and clear. Luckily, pasty butt is super easy to treat at home. If some of your chicks have pasty butt, grab a warm washcloth or cotton ball and gently rub the area to loosen the blockage. Never try to remove it without dampening the area first, as their vent is incredibly delicate and could tear. Be sure to dry them off when you are done, as chicks get chilled quite easily.
Your baby chicks should be in the clear after a week or two. But be diligent about checking them for the first two weeks!
made of chicken wire, held together with a mason jar ring to keep them off the waterer.
Hydrating Your Baby Chicks
Fresh clean water is one of the most important things to introduce to your baby chicks! After their journey through the mail, they are bound to be a bit tired and dehydrated. A good drink of room temperature water will give them an immediate boost. Supplements can also provide some added vitamins and electrolytes.
When we picked up our chicks from the post office, we got them home as quickly as we could. The first thing we did was show them where the water was located. Chicks don’t actually understand how to drink on their own unless you show them first. Normally they would learn from watching their momma, but since you are technically their parent now, you’ll have to show them.
The best way to teach them is to pick up each chick individually and gently dip each chick’s beak into the water source. Do this a few times to make sure they understand where to get water from. If they start going to the waterer on your own, then your job is done!
And just as important as giving them water? Making sure your waterer is safe for your chicks! Chicks can easily drown in waterers that are more deep set, so I would recommend going with a very shallow dish, or adding in some pebbles to keep your chicks from drowning. We like to start them off with a small mason jar waterer while they are still tiny.
Additionally, your chick waterer will need to grow with your chicks. Your baby chicks can develop issues if they have to hunch over unnaturally to reach their water source. As they start to get bigger, you can either prop up your waterer on a wood block or hang it above their brooder and make adjustments as they grow.
The Best Feed for Baby Chicks
Believe it or not, baby chicks are ok without food for 48-72 hours after hatching. This is because they absorb the remaining egg yolk right before hatching. While feeding them is important, this is not as important as making sure your chicks are adequately hydrated. Once your chicks have had some time to settle in and get a drink, you can put out their feeder to get them started on food.
Make sure to keep your feeder and waterer in a separate area of the brooder away from the heat lamp. A chick starter feed is what your chicks need. They are usually super high in protein (anywhere from 20-24%) to help your chicks grow big and strong. Any local agricultural store should carry chick starter feed. After their first week, you can introduce them to a little chick grit in their feed. Follow the bag’s instructions on how much to incorporate into their feed.
Be sure to switch to a grower feed around 8 weeks. We would say a medicated feed is a good option if you don’t vaccinate your chicks. In our first flock, we did end up losing one of our babies early on due to illness. While some of that just isn’t preventable (day-old chicks are quite delicate after all), it can’t hurt to opt for vaccination or a medicated feed to get your birds started on the right foot. Just like your watering station, your feeder will need to be raised up as your chicks grow. This prevents any physical problems from developing due to bending into an unnatural position.
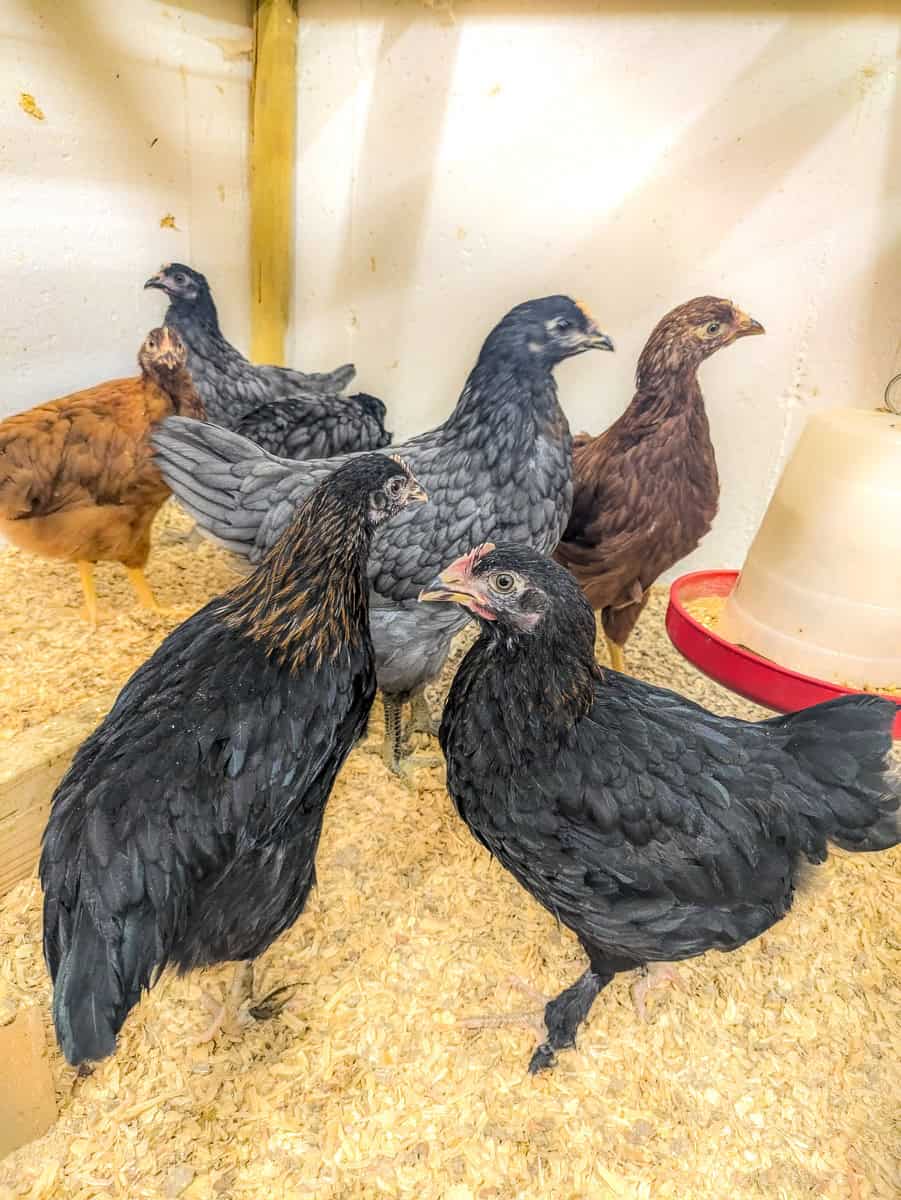
Enrichment for Baby Chicks
Some boredom busters can be really enriching for your flock. Not only that, but it will totally help you bond with your chicks. And you’ll get a chance to see each of their personalities shine. We added a “chick swing” in our brooder that the chicks quickly took to. It was so much fun to watch them hop up and take turns on the swing! This is also a good introduction to roosting bars for them. When your chicks get a bit older, some fresh grasses or weeds with a bit of dirt from outside can be a nice way to slowly introduce them to “outdoor” life as well. They will love scratching and pecking at it to look for bugs.
Boredom busters are something you can do for your flock even once they graduate to coop life. It’s something we have always done for our backyard chickens, and we highly recommend it!
Graduating From Brooder to Coop
When is it time for your chicks to make the jump from the safety of the brooder to their permanent home in the coop? The answer is different for every “chicken tender.” Generally speaking, your birds are ready for the coop between 6 to 8 weeks of age, but it’s good to keep in mind your local climate conditions and the time of year. It will be different for everyone depending on where you live. So, what I do may not work for you. We were able to put our birds outside after 6 weeks without any issues.
Another factor is waiting until they are fully feathered. If you are raising your chicks in a very cold area, then it’s good to keep them inside for a bit longer till they are hardier. A shed or a barn should be fine as long as you keep them away from drafty areas. Some people add supplemental heat to their coop in colder months. Personally, we do not use supplemental heat because we don’t want our birds to get used to it in case of a power outage. We’ve never lost a chicken due to cold temperatures. The only situation where we’d consider using one is in extreme weather conditions.
Another factor is whether you already have some adult chickens present in the coop. You want to introduce the chickens when they are big enough to defend themselves from the larger chickens. This is where you will see the “pecking order” come into play.
Springtime and summer are generally the best time to raise chicks at home, as this time of year typically offers good weather for chicks to get acclimated to outdoor living. That’s why we like to raise new batches of birds in the warmer weather, so they can go out to the coop at 6-8 weeks without issue.
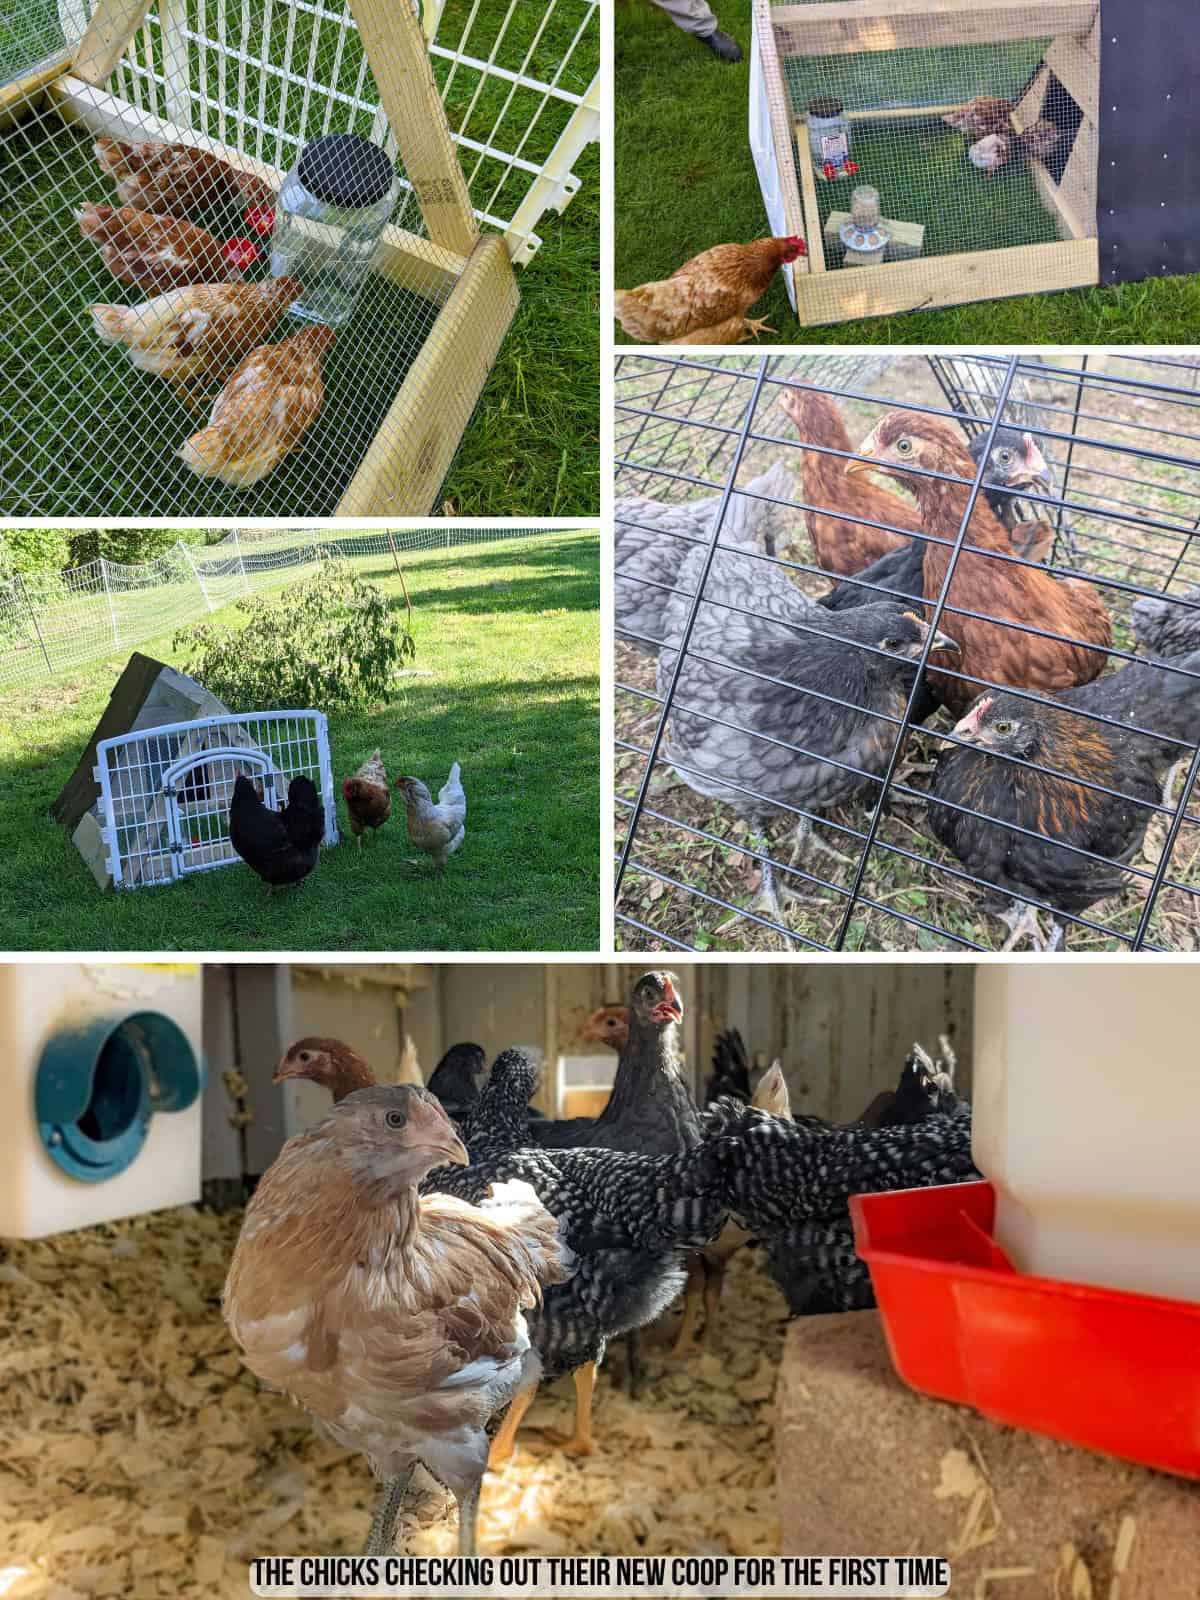
It’s Time for Coop Life!
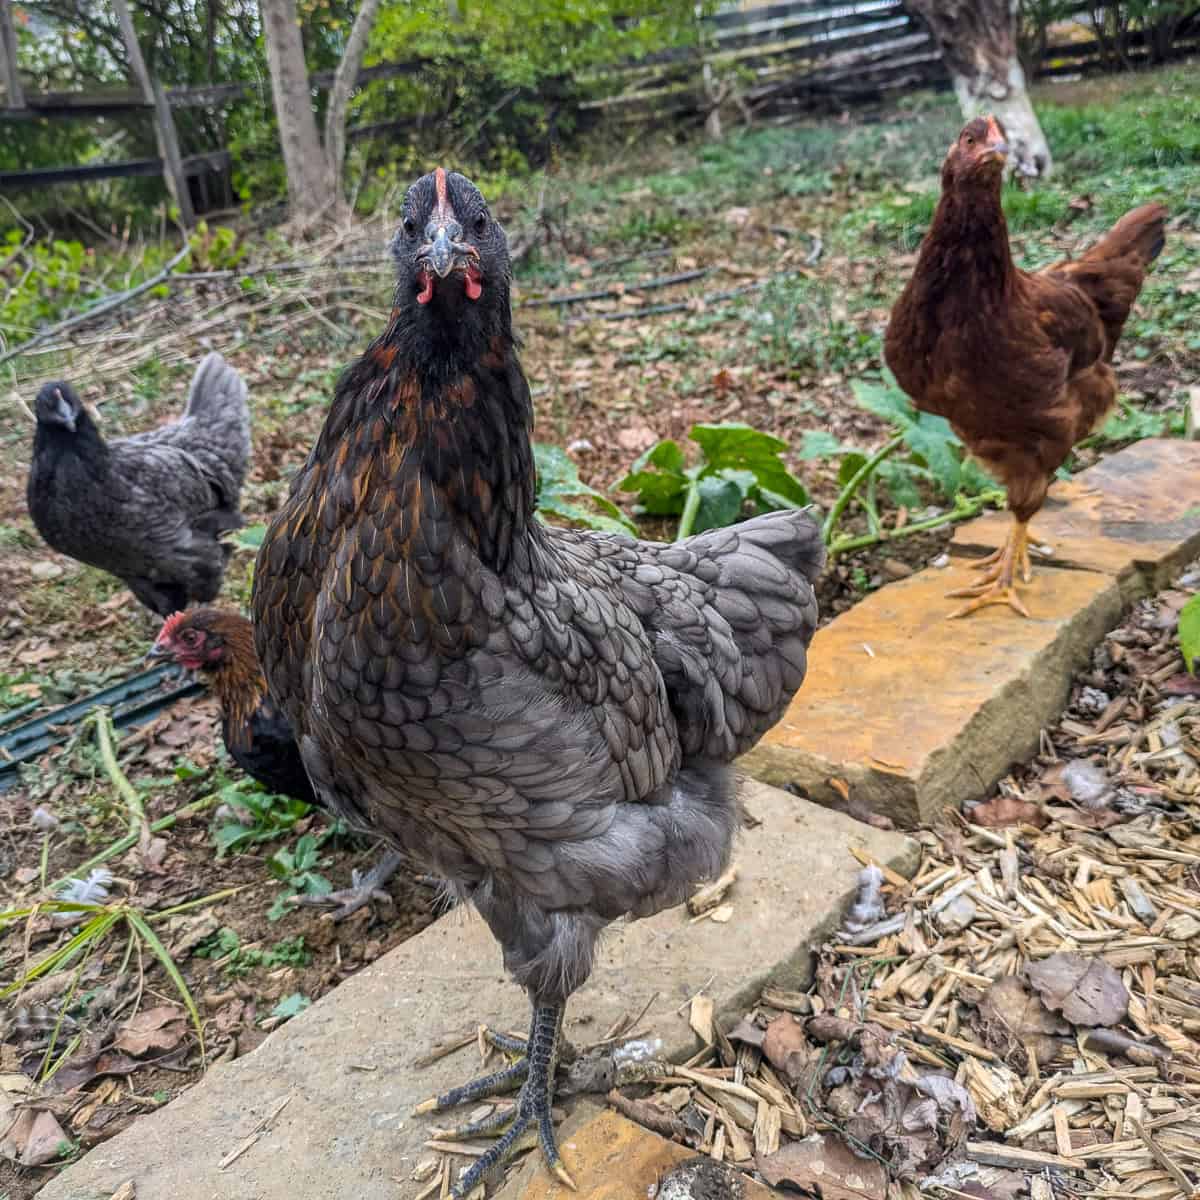
You did it! Maybe it felt like a long few weeks, but now it’s time to pull on your rubber boots and introduce your flock to the big beautiful world outside. You officially have backyard chickens!
We highly recommend a perimeter fence to keep your flock from wandering off too far from your property. And while a fence won’t keep all predators out, it can be a bit of a deterrent for some of them.
Our fence is electric to help reduce predator attacks and to keep our chickens from wandering off into neighboring properties. Also, be sure to have the chicken run properly secured with wire buried well below the chicken run structure if you need to keep them from free ranging for various reasons. We use 1/2 inch hardware cloth welded wire vs chicken wire for our chicken run. Standard chicken wire can still allow pests like snakes and small rodents.
Because our property is so close to the woods, we always struggle with hawks and foxes—even the occasional raccoon. A strong, sturdy coop is your best bet for nighttime security. Another feature we highly recommend is an automatic chicken coop door. We let our girls free range during the day, but we make sure they are all roosting and in the coop once it’s dark. We can see them on our “coop cam” and then we also have an automatic chicken coop door that fully closes them in for the night.
Keeping your new Chickens Healthy
Here’s a great article from Myers Poultry on Biosecurity which goes over all sorts of great information on keeping your new chickens healthy.
I hope this has been helpful for you and your journey in raising backyard chickens. We love our flock and we want to share the love and joy they have brought into our lives—we couldn’t imagine our lives now without our birds.
If you have any questions about raising backyard chickens, feel free to ask us below in the comments.
Comments are welcome & encouraged, however we have the right to refuse to publish it if it is hateful in nature and not constructive criticism. We ask that they be polite & stay on topic as well.